
Class Session: Monday Feb 26, 2018
Exercise One
I will demonstrate this with Word for Windows.
Mac Users, you can view Mac Screen shots here. Ignore the first link, don't go to Project Gutenberg yet for this exercise.
We will use MSWord to discuss effective formatting of text documents, but knowing that one can also use LibreOffice Writer as an alternative way of applying the same principles. First, let's consider some of the structural elements:
- Pages
- Paragraphs
- Text
To do so, open the The Awful German Language, text file by Mark Twain. Copy it all, then open Word and paste it into a new document so we can work with it.
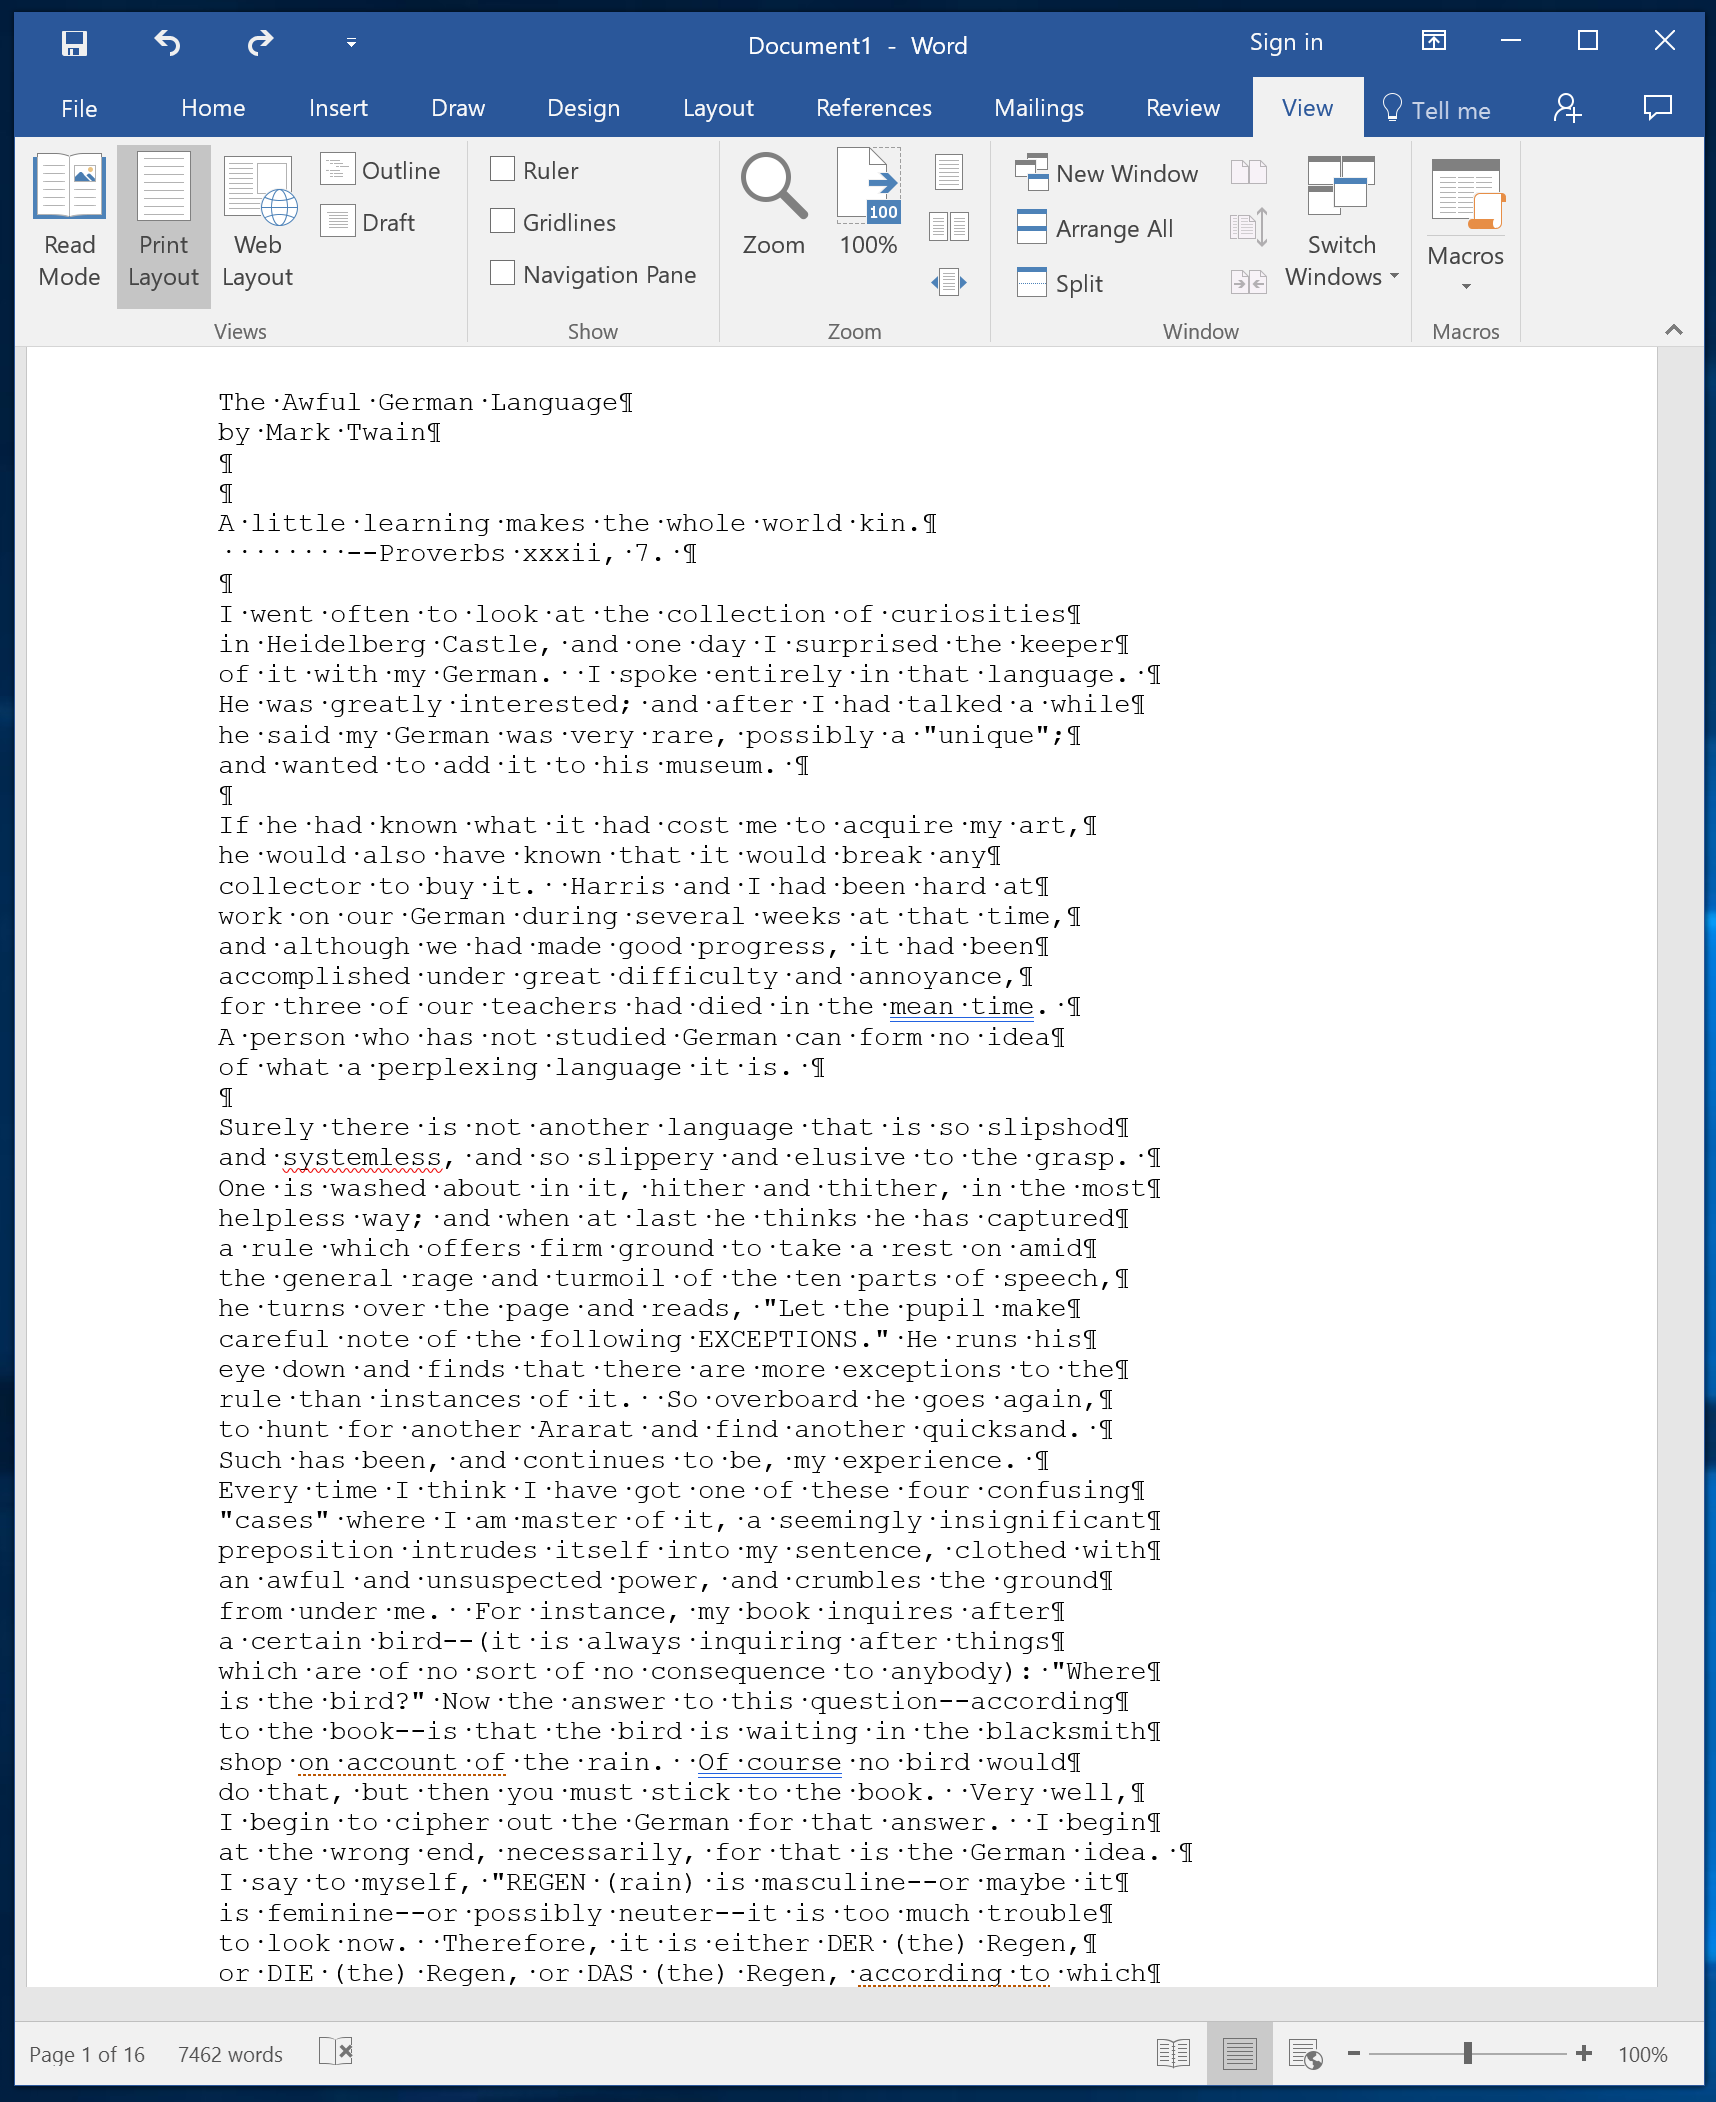
Practice setting up a document using The Awful German Language, by Mark Twain. If you haven't done it already, copy it all, then paste it into a Word document so we can work with it. The screenshots on this page will be of a different document, but the procedures you follow will be the same
File naming
The document is now ready to be formatted with more sophisticated tools. Save it as
- LastName.FirstName.YYYYMMDD.Twain.German.docx
- as an example, James.Hinton.Twain.German.docx
Saving it as a .docx allows you to do some object manipulation not available in a .txt file. If you choose to use another markup tool, be sure to use one that creates files that can be opened in a basic windows PC, one that has either MSOffice or OpenOffice installed.
Set this document up for publishing. The instructions below assume you use MSWord. You don't have to use this tool, but if you use another tool, be sure that the end result meets the specs.
Find and Replace Slideshow:
This slide show that will help clarify the many steps involved in removing hard returns. Look at it before you read the Find and Replace section, and look at it again after you read the section, and you will be able to use the slide show to do your practice
Find and replace
Use the find and replace tool (it's easiest to use CNTL+H) to tidy up the text. You can see that there is a single paragraph mark each time the line needs to break, and there are two consecutive paragraph marks each time a new paragraph starts. We need to replace all the non-essential paragraph marks with blank spaces, so that the text will wrap automatically all the way to the end of each paragraph. This is a multi-step process.
-
Find and replace the end of paragraph markup
This means you need to find two consecutive paragraph marks because the raw text uses a paragraph mark to break a line and uses two consecutive paragraph marks to denote a paragraph break. Either use the More and Special buttons to find a Paragraph mark, or type in ^p^p.
You want to replace these markup symbols with some special mark not in the text [so you can differentiate between end of sentence breaks and end of paragraph breaks]. You could mark the end of each paragraph by using three @ characters, by typing in @@@. In fact, you want to replace all to make sure it actually goes through the entire text and replaces everything.
You now have used the @@@ symbols to mark the paragraphs.
-
Find and replace the end of sentence markup
What was the end of sentence markup? It was a single paragraph mark. So you need to find all the single paragraph marks [^p] and replace them all with a space.
Why a space?
- Because the source document has no space between words that end one line and begin the next. You need to add a space to keep the words separate.
- Put your cursor in the window and enter a space with the space bar. Then replace all to make sure it actually goes through the entire text and replaces everything.
You have now taken out all the unnecessary paragraph marks and allowed the text to wrap in each paragraph.
-
Now you need to go back and put the paragraph breaks back in
So find all the symbols that marked the paragraph breaks.
- Remember, you replaced the end of paragraph markup a few minutes ago by marking the location with @@@. So, you want to replace these marks with a single paragraph mark.
- Type in ^p and replace all to make sure it actually goes through the entire text and replaces everything.
![[MSWord 2007 CNTL+H dialog box]](https://ils.unc.edu/courses/2017_spring/inls161_001/images/markup.CNTL+H.png)
How many replacements do you think it will make? If you replaced the original end of paragraph markup with new symbols, this find and replace action should put an actual paragraph ending mark in the same number of places.
Now the document is set up with all the lines wrapping, with paragraph marks used only to designate a true break between paragraphs. It may not be perfect, so be ready to modify some items if you discover problems. We want to have a good-looking product.
Page setup
Set the document up for the a printer. But before you do that, be sure that your program is set up to work for you and not against you. From File, find your Options,
![[MSWord 2007 Word Options selector]](https://ils.unc.edu/courses/2017_spring/inls161_001/images/markup.word-options.png)
and be sure your measurement units are in inches. [do this for this exercise only; you can use any measurement unit you prefer in your own work]
![[MSWord 2007 options dialog box]](https://ils.unc.edu/courses/2017_spring/inls161_001/images/markup.word-options.dialog.png)
Set up the pages so that they will print out in European letter paper format, on both sides of the paper in portrait orientation. The pages should have a .5 inch gutter with mirrored margins, .75 inch margins inside and outside, 1 inch margins top and bottom.
![[MSWord 2007 paper setup dialog box]](https://ils.unc.edu/courses/2017_spring/inls161_001/images/markup.page-setup.dialog.paper.png)
![[MSWord 2007 margins dialog box]](https://ils.unc.edu/courses/2017_spring/inls161_001/images/markup.page-setup.dialog.margins.png)
Themes and style sheets
Format the document so that it looks like a polished product. Apply the Urban theme template from the Theme Style Gallery (so that you will have access to a pre-set stylesheet).
![[MSWord 2007 Themes selector]](https://ils.unc.edu/courses/2017_spring/inls161_001/images/markup.themes.urban.png)
This will provide you a CSS-like set of styles that you will modify in future exercises.
Modify a style
Since the document is now formatted with all text in the Normal style, we need to modify the Normal style
![[MSWord 2007 styles sidebar]](https://ils.unc.edu/courses/2017_spring/inls161_001/images/markup.modify-styles.png)
Using the Styles sidebar, select all the instances of the Normal style so that you can modify the style
Modify the paragraph property to 0" indentation and Auto spacing before and after
![[MSWord 2007 paragraph properties dialog box]](https://ils.unc.edu/courses/2017_spring/inls161_001/images/markup.paragraph-properties.dialog.png)
This has allowed us to modify our Style Sheet so that each time we use the Normal style, we will have the indentation we want and the correct spacing between paragraphs