Class Schedule
22 AUG | intro
27 AUG | clients
29 AUG | servers
05 Sep | networks
10 Sep | basics lab
12 Sep | structural layer
17 Sep | presentational layer
19 Sep | working with layers
24 Sep | behavior layer
26 Sep | images & design
01 Oct | website lab
03 Oct | object layers
08 Oct | graphics
10 Oct | document markup lab
15 Oct | spreadsheets
17 Oct | formulas & functions
22 Oct | thoughts about data display
18 Oct | Fall Break
24 Oct | database tools
29 Oct | spreadsheets lab
31 Oct | relational databases
05 Nov | tables
07 Nov | relationships
12 Nov | input & output
14 Nov | SQL
19 Nov | complex queries
26 Nov | databases lab
21 Nov | Thanksgiving
28 Nov | presentations in general
03 Dec | presentation delivery |
packaging |
next session
05 Dec | presentation lab
12 Dec | 0800-1100 | final in class presentation

This work
is licensed under a
Creative Commons Attribution-NonCommercial-ShareAlike 3.0 Unported License.
home & schedule | class blog | syllabus | contact | grades
Help your viewers follow your presentation with on-screen mapping,
and let that mapping help you control the presentation as you are giving it.
Use visual cues to help the viewer and the presenter
Navigation
It is wise to figure some way for you to display to your viewers where they are in the presentation, so they can have a visual orientation. You can create that ability at the same time as you create a way for you to control the flow of slides on the screen without having to leave the full screen view.
back to top
Transition between slides
If you want to have effects introduce the slide, reveal the Slide Transition tool from the animations ribbon.
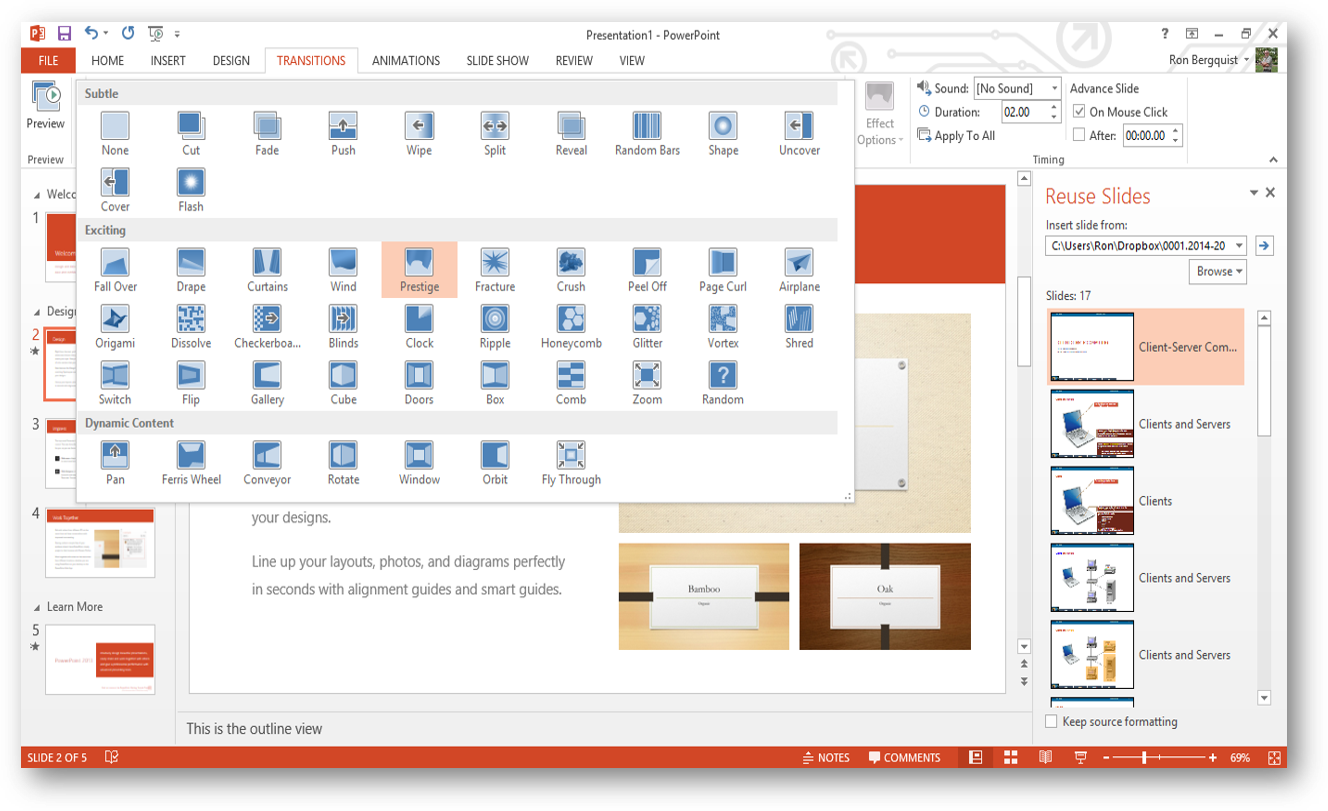
- using the shift key or the control key, as appropriate, along with the mouse, select the slides that you wish to display transition effects
- use the transition tool to apply, to a single slide, a group of slides, or all the slides
- you can select the type of transition effect, the speed of the effect, sounds to accompany transition, and whether the transition effect happens automatically or upon your action
back to top
Animation of objects on slides
You may also choose to animate specific objects on individual slides so that they appear with effects you select. In the Animation ribbon, use Custom Animation to reveal the dialog box.
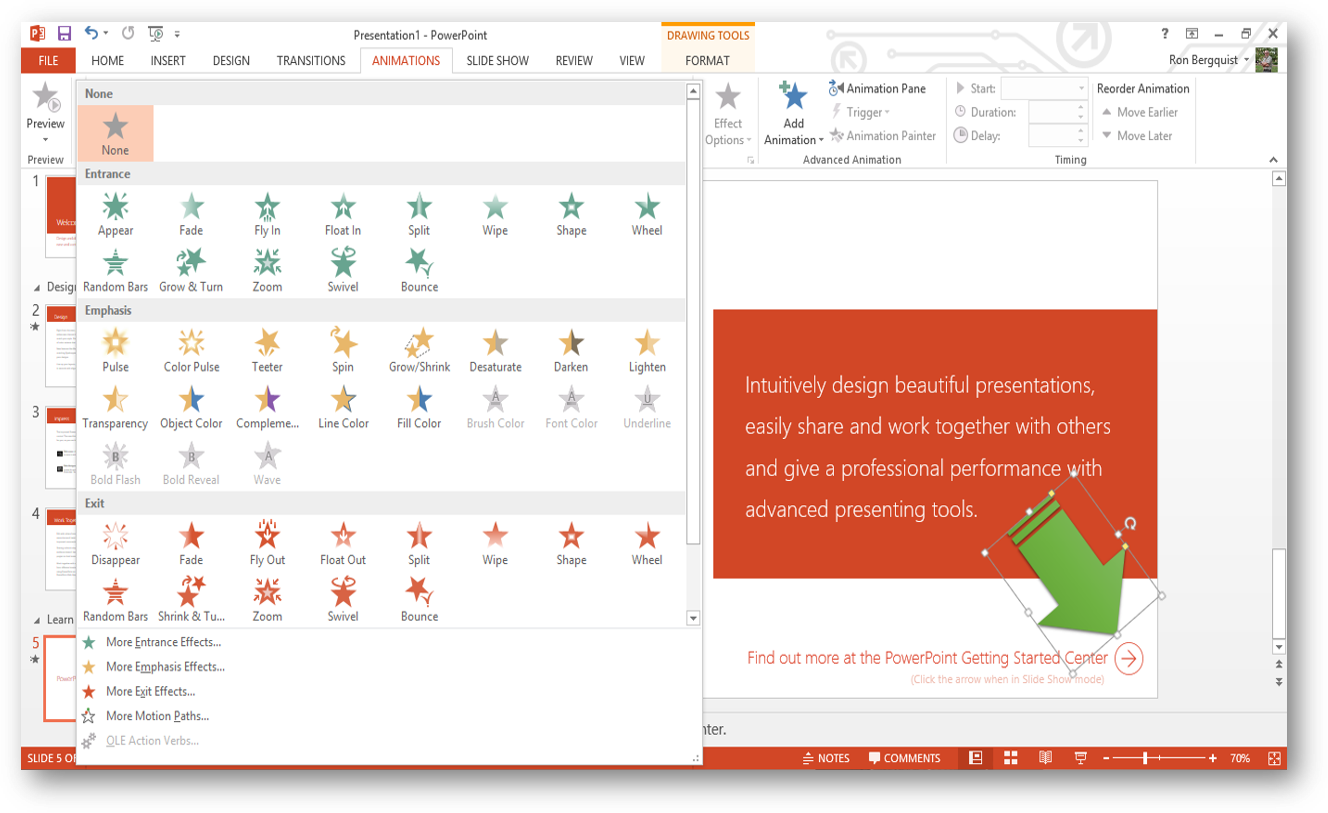
- using this box, you can decide which objects to animate, the order and timing that the animation will take effect, and the visual and audio effects that apply to each object
- you can also use this dialog box to preview what an animation will look like
- here is where you decide how to reveal text on your slides
- if you wish to have objects appear simultaneously, you will have to group them using your drawing toolbar so that the custom animation can animate the grouping, rather than the individual components
back to top
Hiding slides
To incorporate a slide in your presentation, but hide it so that it does not show unless you decide to show it, go to Slide Sorter view, select the slide to be hidden and press the hide slide button.
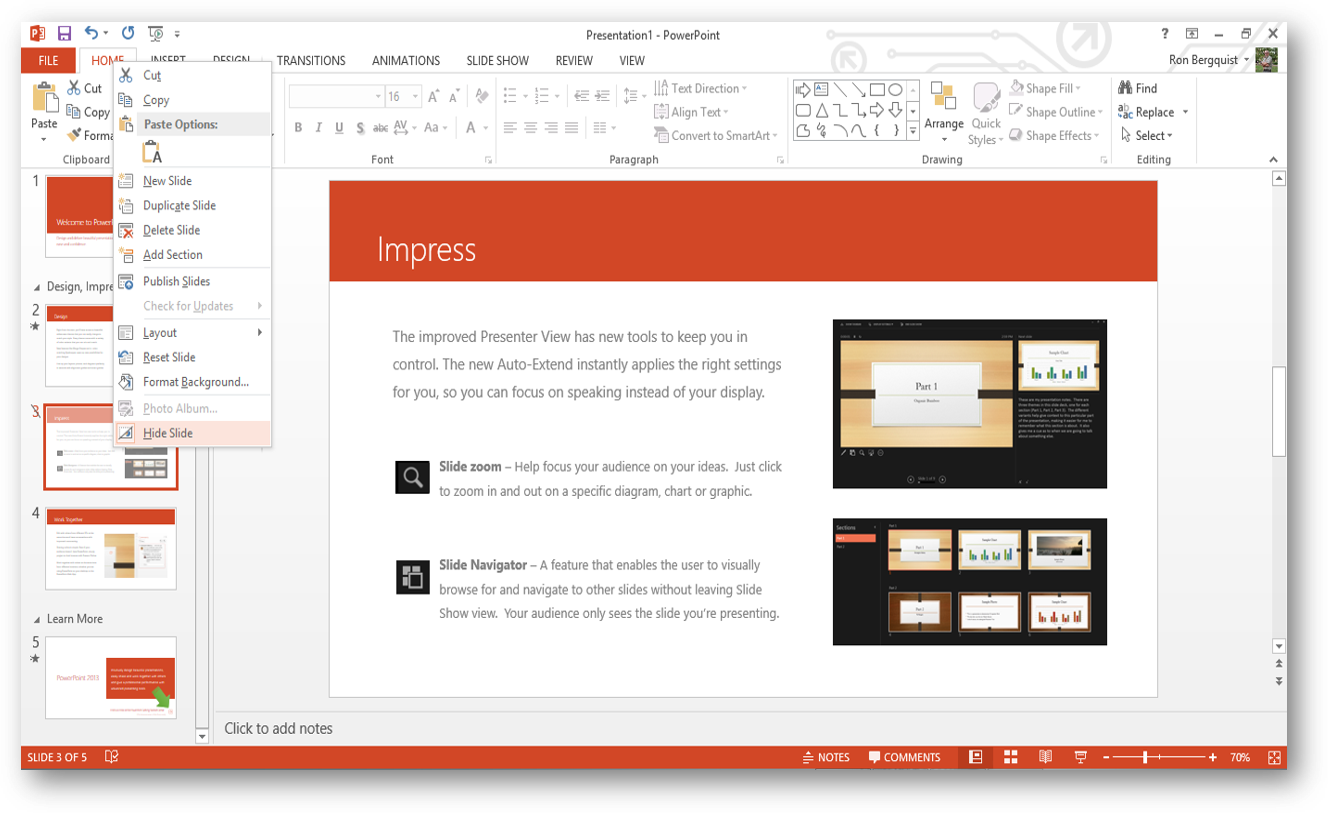
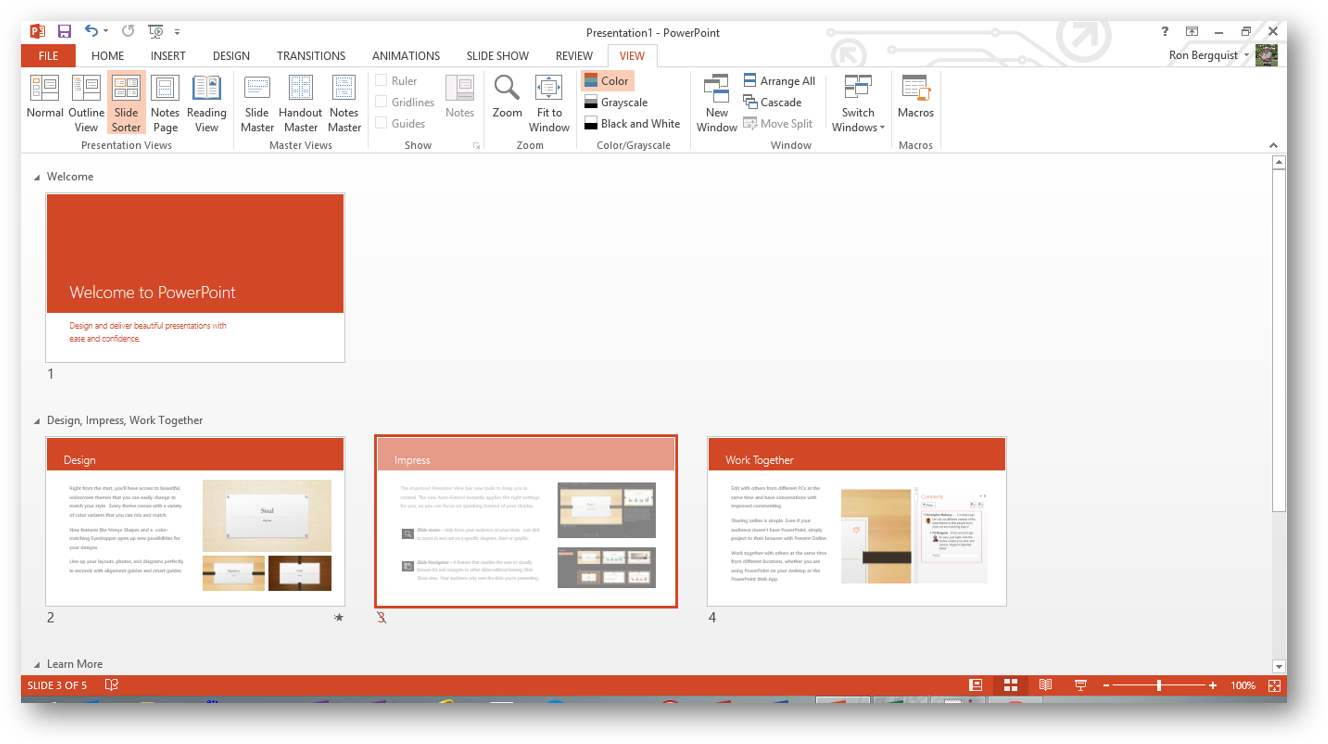
- the slide will have its number crossed out in the Slide Sorter view and will not display in the Slide Show view
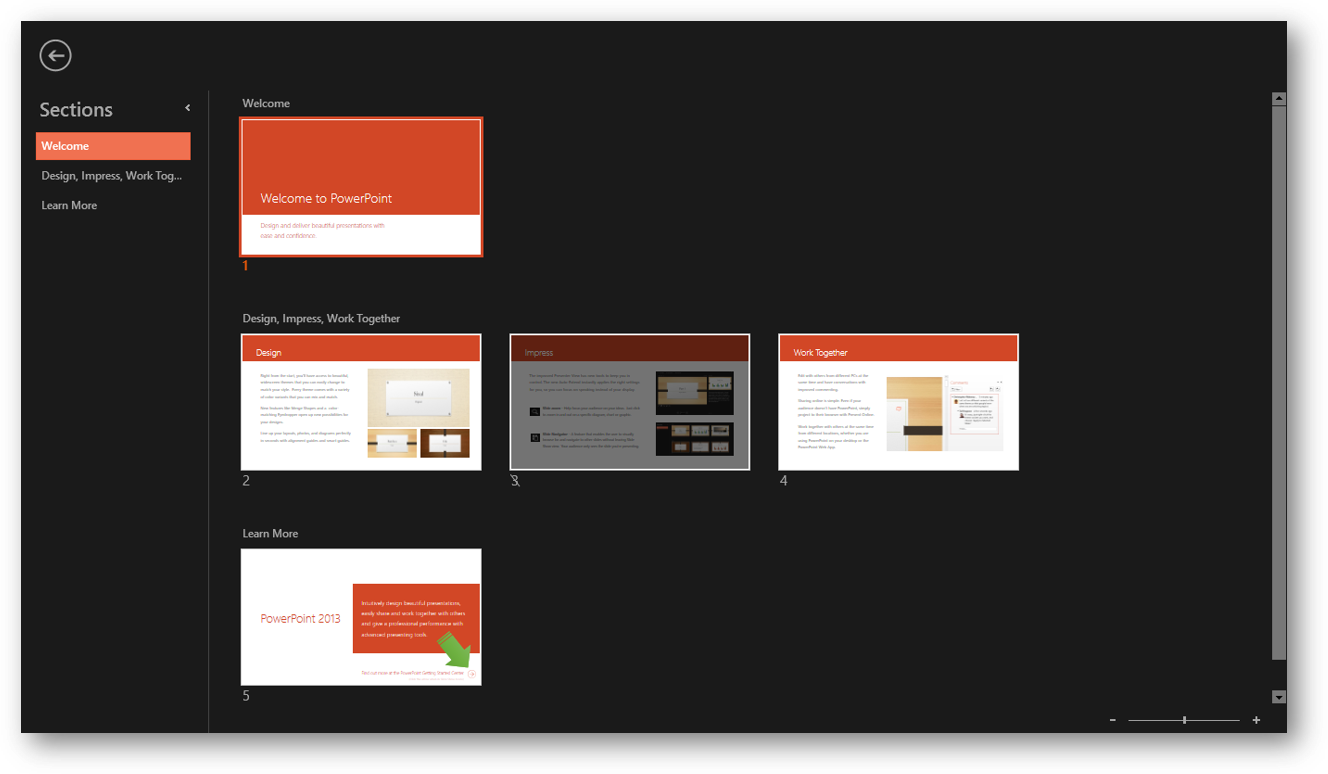
- if you wish to display a hidden slide in Slide Show view, right click on any slide and a dialog box will appear
- with this dialog box, you can Go to the slide of your choice
- the slide you are on will be highlighted and any hidden slides will be identified by being greyed out and having their sequential numbers crossed through
- you can then select the hidden slide with your mouse and go directly to it
back to top
Linking slides
You may also hyperlink from one slide to another in a presentation, or to a hidden slide.
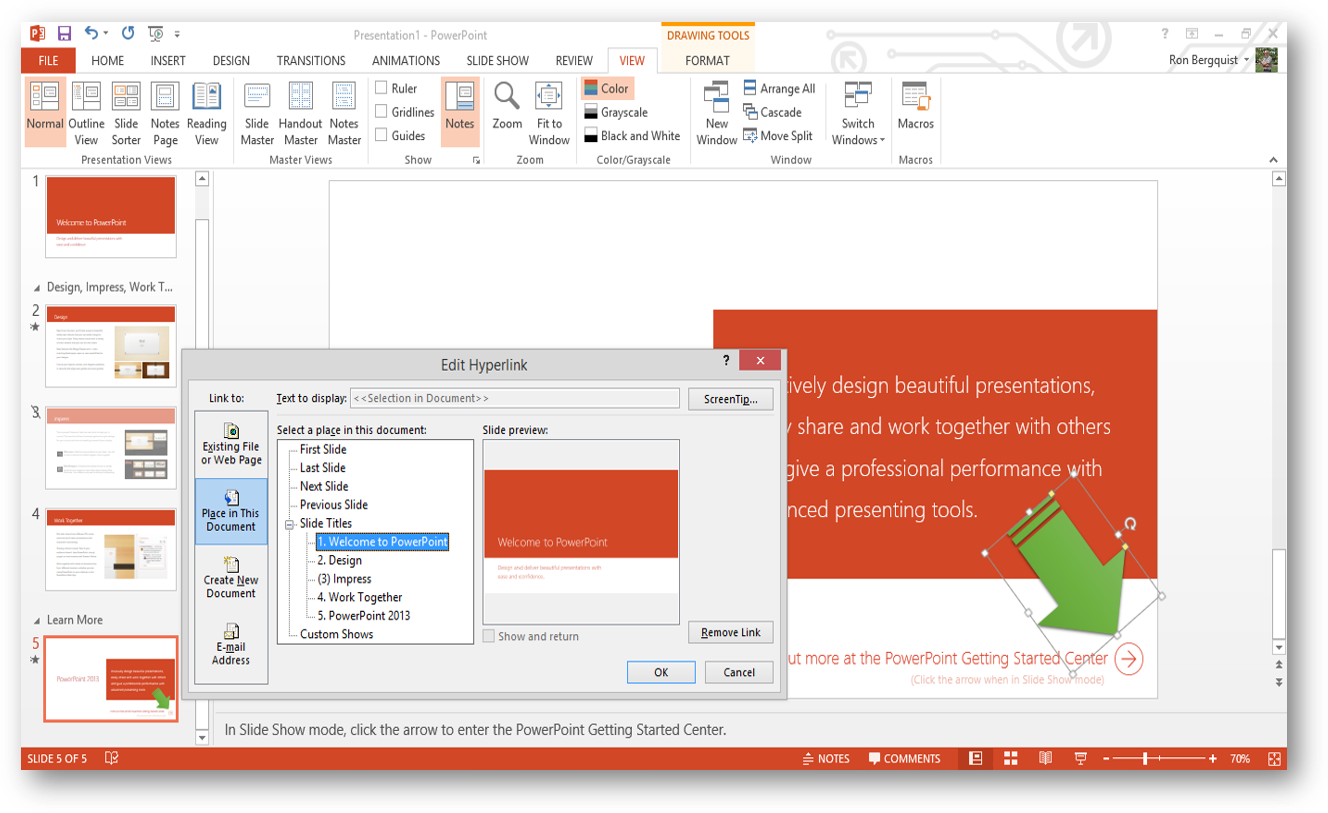
in Normal or Slide view, select an object (which may also be text) that you wish to attach a hyperlink to, then right click to bring up a dialog box which will allow you to select the object, either in the slide show, in a file, or on the web, that you wish to link to.
back to top
Handouts
You may wish to leave your audience with a paper copy of your presentation.
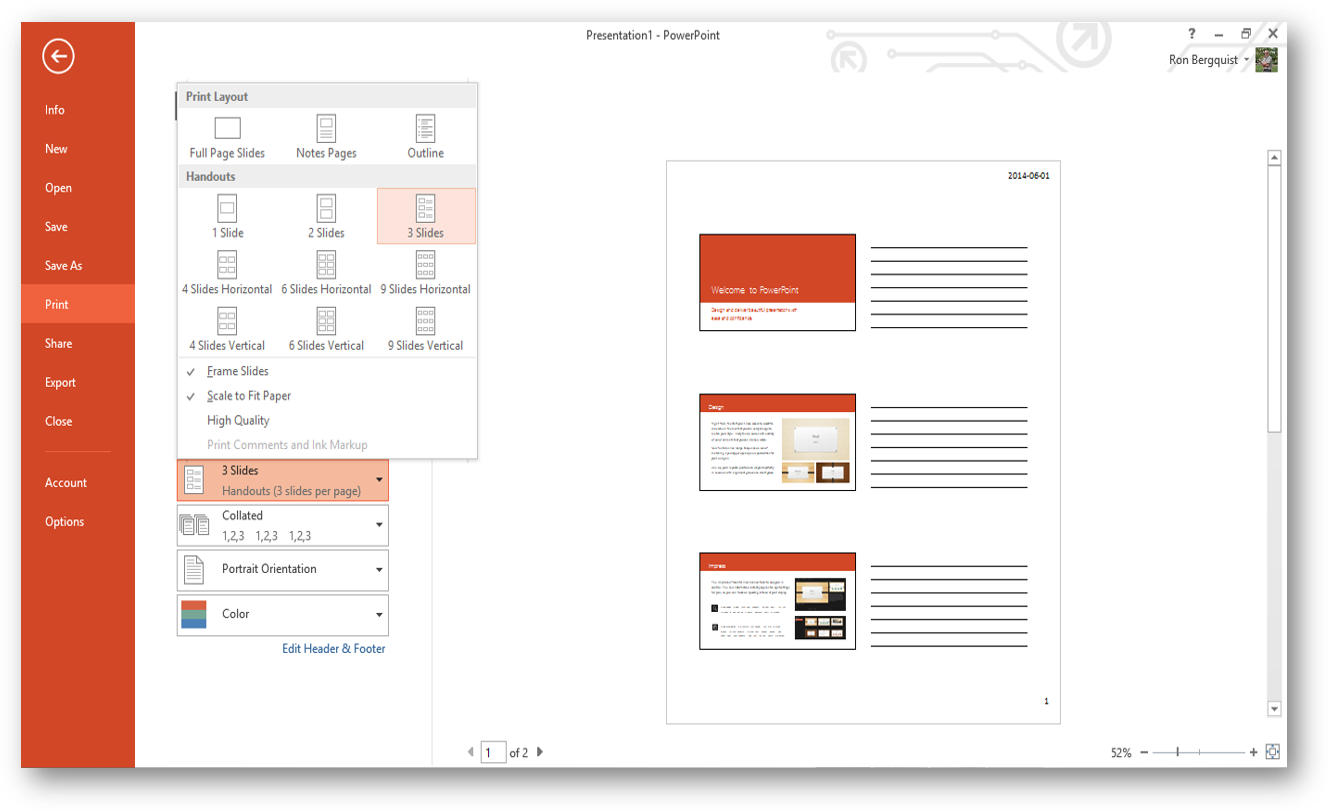
- you can print out either small copies of your slides in 2, 3, 4, 6, or 9 slides per page format by using the Home Button > Print dialog box
- or you can provide them notes to accompany each slide by selecting Notes Pages with the Print what menu on the print dialog box
- by using the View > Master > Notes Master drawdown menu, you can customize the format for how your Notes Pages will print out by modifying the shape and location of the objects on the page
