
Session Date: Monday Sep 11, 2017
Basics Lab
Use this time to finish up your Basics Tasks.
Overview
My goal for this lab is for you to get the screen shots up using the Git Workflow. Although this tutorial seems lengthy, once you get the hang of git, you should be able to do these basic steps in less than a minute or two. There is nothing else you really need to know about git for the purposes of this class. You will use this same process to work with your web design files.
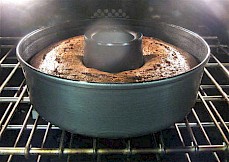
If you think about any project that requires steps, most go through the same phases: for example, consider baking a cake (see slideshow):
- You clone a recipe if you have one; if not you init your own recipe.
- You then stage your ingredients. If the milk is sour, you don't add it. If you are out of eggs, you have to go buy some. If you discover that an egg is cracked, you may have staged it, but you don't add it because it might lead to everyone getting sick. When all is staged and good, you put it all in the bowl and then put it in a baking pan. This is like git add.
- When it is ready to be cooked, you commit it to the oven. You set the timer for 30 minutes. That is like the message part of the commit:
cook add-to-oven -m "set timer to 30 min" - When it is done, you push it to the server plate (you are the server) then your guests are able to enjoy
What is better about git though, is that it is a version control system, so if you burn something, you can get it back to your staged step without going back to the store to buy more eggs.
I am not going to start out with the demo. I want everyone to try to do this on their own. I will help out if you need help. Some of you will go though each of these steps without any problems, and I don't want you to have to wait when others get stuck. Those that finish before others, can work on this unix tutorial for task 1.8. If you don't get to the unix tutorial today, don't worry about it, you don't have to get that done by the basics due date.
Every one should now have completed all tasks except the second part of task 1.5 and task 1.8.
The second part of task 1.5 is to push your screen shots up to the source control.
This tutorial will help you get the second part of task 1.5 done.
This tutorial will work for PC or mac.
Next Steps: Task 1.5
If you have done the initial git clone, then log back into your terminal or git bash and then run the cd command with the autocomplete function (start typing a few characters and hit tab) so that you are back in the proper directory:
cd 2017-fall-inls-161-tasks
To verify that you are in the correct directory, do a present working directory command pwd (this command has nothing to do with a password)
pwd
You will get confirmation and then another start prompt:
/Users/username/2017-fall-inls-161-tasks                   # confirmation
user-computer 2017-fall-inls-161-tasks username $          # next start prompt
Because you are in a directory, if you use a make directory command (mkdir) you will create a sub directory in that directory. To do that, use the make directory command and create the following 01-basics subdirectory:
mkdir 01-basics
Now cd into that directory and make a directory in that directory named screen-shots
mkdir screen-shots
You are still in the 01-basics directory, so if you type ls you will see a listing of the directory you just made.
Now, I want your to just type cd all by itself. This will take you back to your user directory.
Do a git status here:
git status
You should get this error:
fatal: Not a git repository (or any of the parent directories): .git
This is what you should expect. Your user directory is not a git repository. However, you do have a git repository in your User directory.
You must be in a git repository to run a git status, so now cd into the 2017-fall-inls-tasks directory. (use the auto-complete method):
cd 2017-fall-inls-161-tasks
now you can run git status:
git status
You will get this message:
On branch master

Initial commit

nothing to commit (create/copy files and use "git add" to track)
What is going on? We just created two new directories!!!
Here is what is going on: git does not track empty directories!
So let's get out of command line mode and go to your desktop finder (mac) or your file explorer (PC) and drag and drop your screen shots into your screenshots folder.
Make sure to name them alertbox.png, techreview.png and vpn.png
After you have them in the folder, go back to terminal or git bash. cd into your task directory if you are not there:
cd 2017-fall-inls-161-tasks
Now do a git status:
Untracked files:
  (use "git add <file>..." to include in what will be committed)

    01-basics/

nothing added to commit but untracked files present (use "git add" to track)
Mac Users: if you see a .DS_Store file, don't be concerned about it
So Git now knows that you have put some files in the repository. It prompts you to "git add" these files. We don't want to enter every file name; we want to add all files. To do that we will enter git add . So do that now:
git add .
Now do another git status:
git status
We will see that they have been staged:
On branch master

Initial commit

Changes to be committed:
  (use "git rm --cached <file>..." to unstage)

    new file:   01-basics/screen-shots/alertbox.png
    new file:   01-basics/screen-shots/techreview.png
    new file:   01-basics/screen-shots/vpn.png
Now you are ready to commit the changes by running:
git commit -m "commit screen shots"
Copy and paste this so you don't make an error, because ...
if you do not run this command correctly you will make the vim editor launch and you will see this screen:
# Please enter the commit message for your changes. Lines starting
# with '#' will be ignored, and an empty message aborts the commit.
# On branch master
#
# Initial commit
#
# Changes to be committed:
#       new file:   01-basics/screen-shots/alertbox.png
#       new file:   01-basics/screen-shots/techreview.png
#       new file:   01-basics/screen-shots/vpn.png
#
~
~
~
~
~
Since I have not taught you how to use the vim editor yet, if this happens, you will have to watch this video and learn the bare minimum of vim.
Once you have the commit done, run git status in 2017-fall-inls-161-tasks directory:
git status
You should see that you are all committed, but you may have a message that your upstream is gone:
On branch master
Your branch is based on 'origin/master', but the upstream is gone.
  (use "git branch --unset-upstream" to fixup)
nothing to commit, working tree clean
If that is the case then follow the directions. Git is very helpful, so make use of the help when you need it.
So run this if you need to:
git branch --unset-upstream
Do another git status
git status
And you should see this:
On branch master
nothing to commit, working tree clean
You are now ready to do a git push:
git push
That should be it!
If you get any scary "fatal messages" from git indicating that an upstream is missing, etc, and it gives you a message on how to fix the problem, just follow the directions and run another git status. If you have any problems, email me over the weekend, or see me before class, or wait until you get to class.
last page update: Tuesday Sep 12, 2017