Login to GitHub with your personal account. If you don't have any account yet, create one! It's free and you'll need it throughout the semester.
Visit the GitHub web page for the assignment. You can find links tothe GitHub web pages for each assignment on the class schedule. The links are on the rightmost column of the schedule.
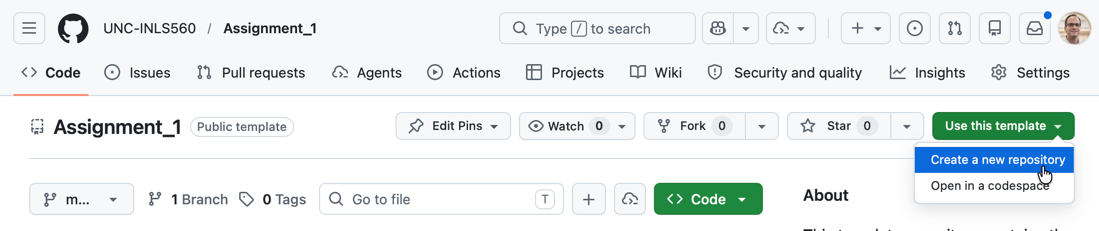
You should see a green "Use this template" button on the top right of the page. Click that button and select "Create a new repository" option from the menu that appears. An example is shown in the screenshot below. If you don't see the green "Use this template" button, you might not be signed in! Be sure to sign in first with your GitHub account.
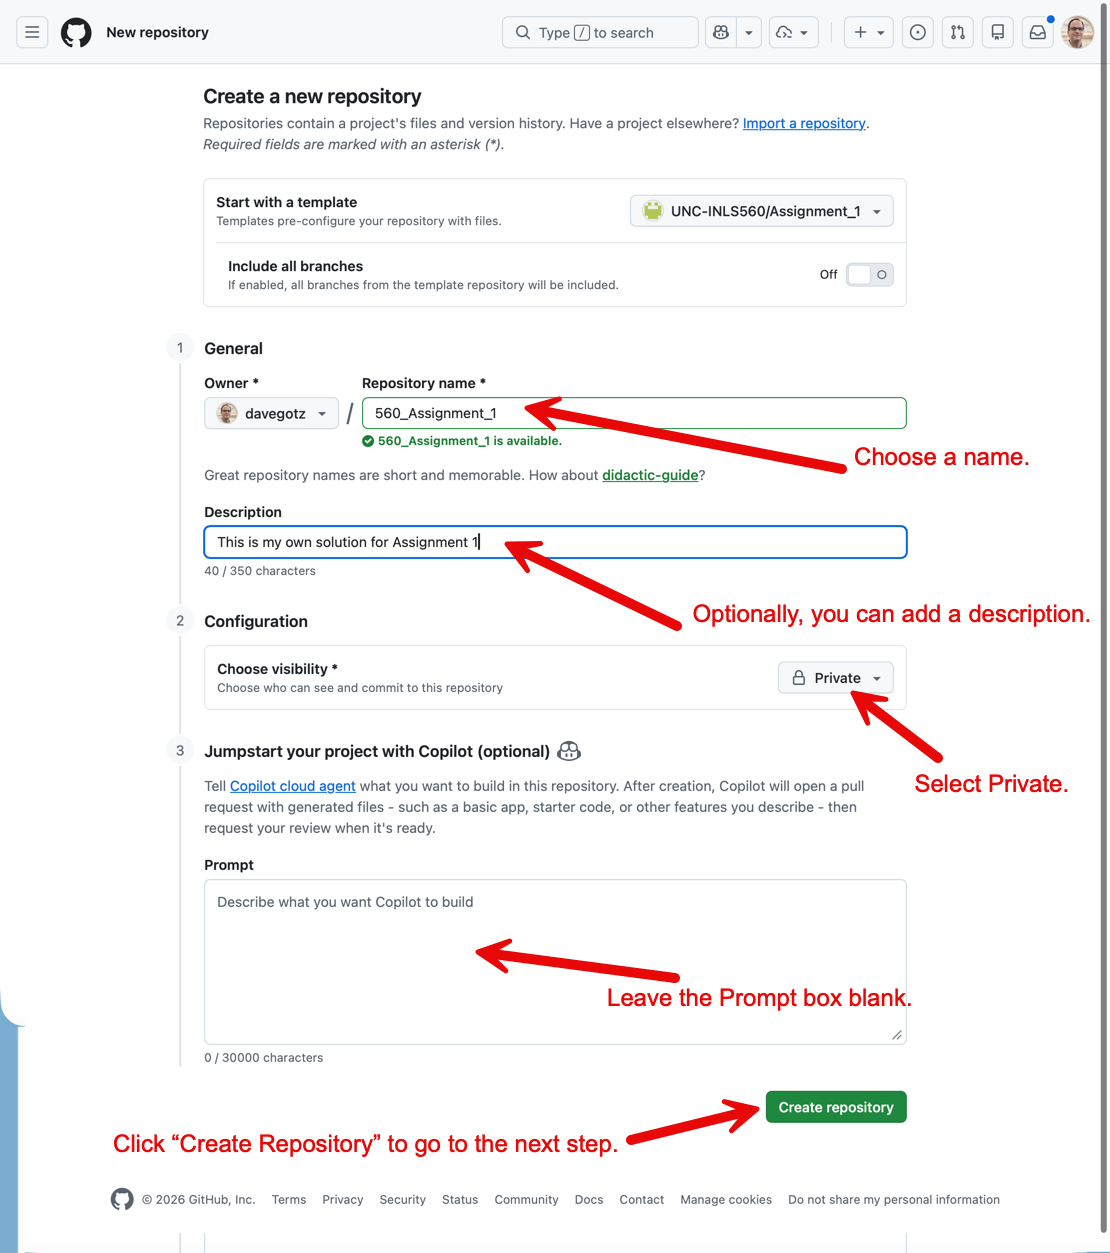
Next you'll need to define some basic settings for your new repository (repo, for short). This is the version of the assignment that is in your personal account, and which will contain your solution. Give it a name. The only requirement is that it is unique within your account, but using something meaningful is a good idea. Using something like "560_Assignment_1" is a reasonable choice. You should make the new repo private so that only you can see your work. When you have filled out the form as shown in the image below, click the green "Create repository" button.
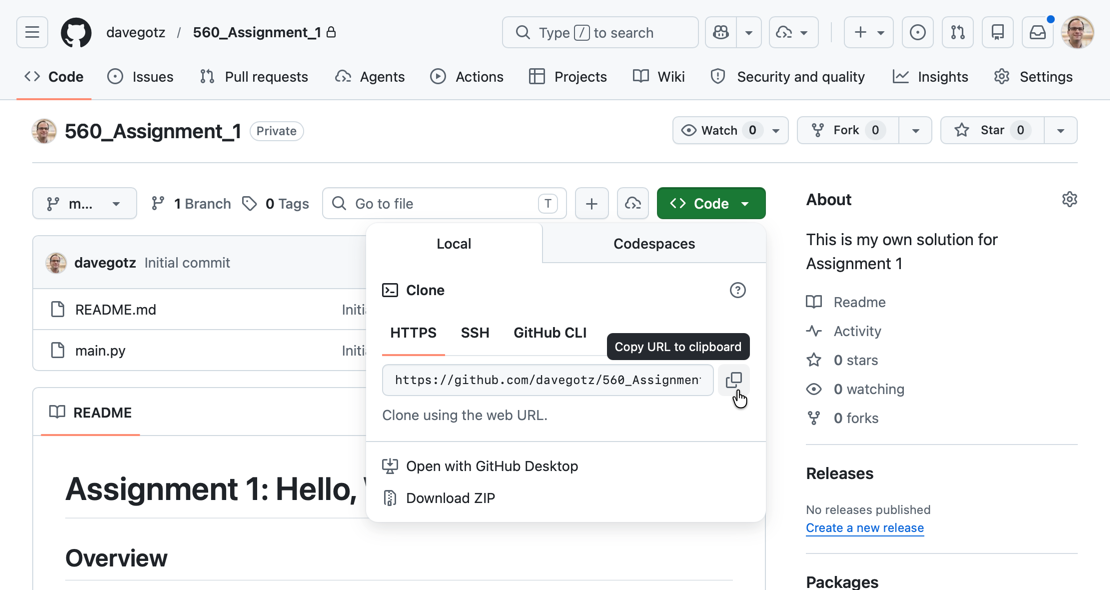
Your web browser should automatically take you to your repo's home page. You can also find your repo's home page by visiting your accounts home page. There you'll find a list of all of your repos. Over the course of the semester, you'll create a number of these. Now all that's left to get started coding is to open this repository inside VS Code.
To get started coding, you'll need to tell VS Code where to find your GitHub repo. That means you'll need your repo's address, which takes the form of a URL that starts with https:// (similar to a web page). You'll need to copy this URL from GitHub and paste it into VS Code to get started with your own edits to the files. To get to the URL, first click the green "< > Code" button on your repo's page. Then use your mouse to click on the "copy to clipboard" icon which looks like two overlapping squares. See the screenshot below.
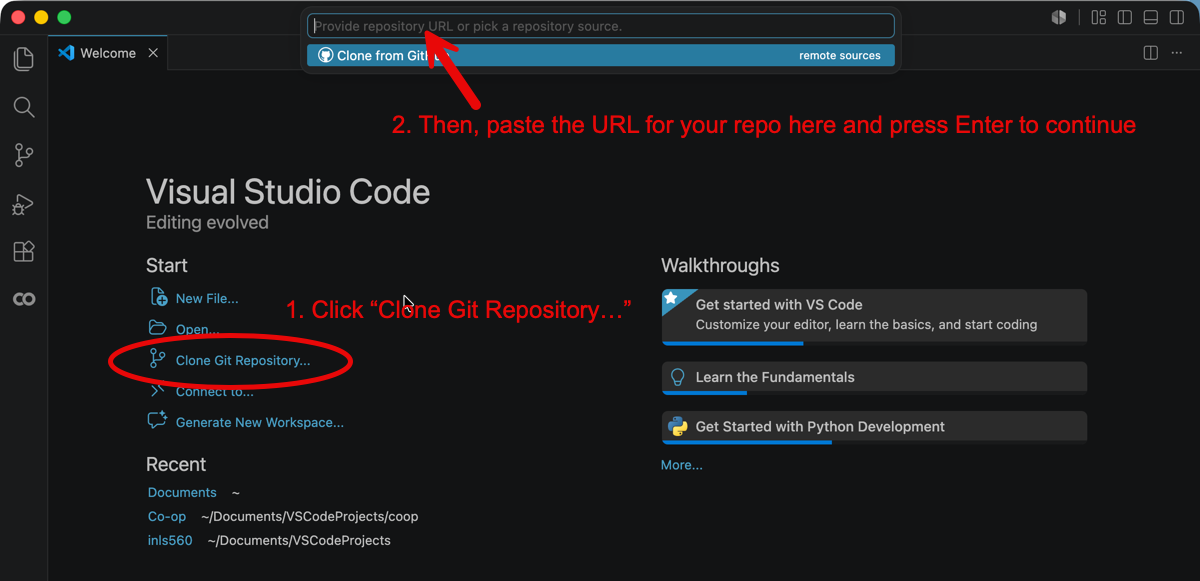
Open VS Code. On the Welcome screen, click "Clone Git Repository...". This will cause a text box to appear at the top of the screen (see the screenshot below) where you need to provide the repo URL. This is where you need the https://... address that you copied from GitHub. Paste it here and press Enter to continue.
VS Code will then ask you where it should save your new project. It will show you a File Browser on your computer and ask you to select where it should put the copy of your GitHub repo on your computer. I suggest that you have a "VSCodeProjects" folder somewhere on your computer. Then, use that folder to store all of your coding projects. However, you can select any folder you'd like for this step. Just remember where you put it so you can find it later!
Your code is now in VS Code and ready to edit! You can click on a file in the "Explorer" section of VS Code to open up an editor for that file. Now it's time to edit the code, test it, and work toward meeting the assignment's requirements! For a step-by-step guide to committing and syncing your edits with GitHub, read these instructions.