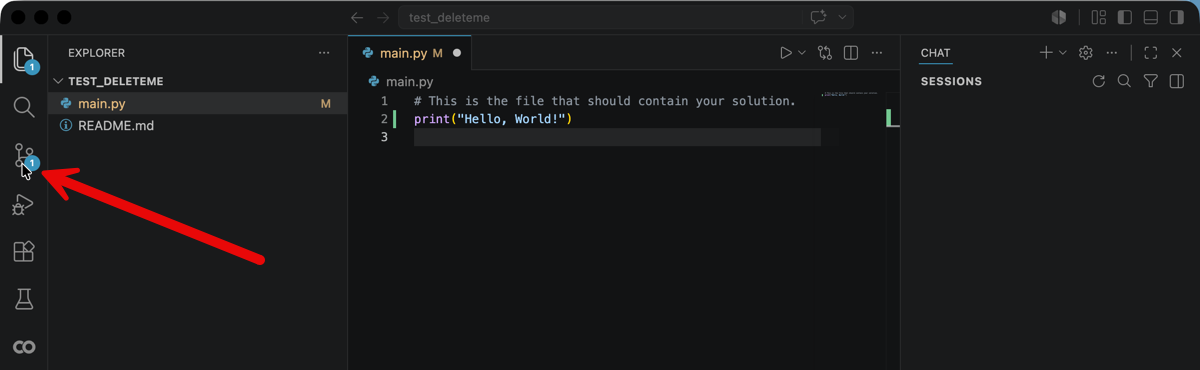
Once you've edited a file in your project and your ready to commit your changes, click on the "Source Control" symbol on the left side of the VS Code window. It looks like some circles connected with lines. It may also have a light blue circle over it showing that VS Code has detected that you have edits that need to be committed. See the screenshot below for an example.
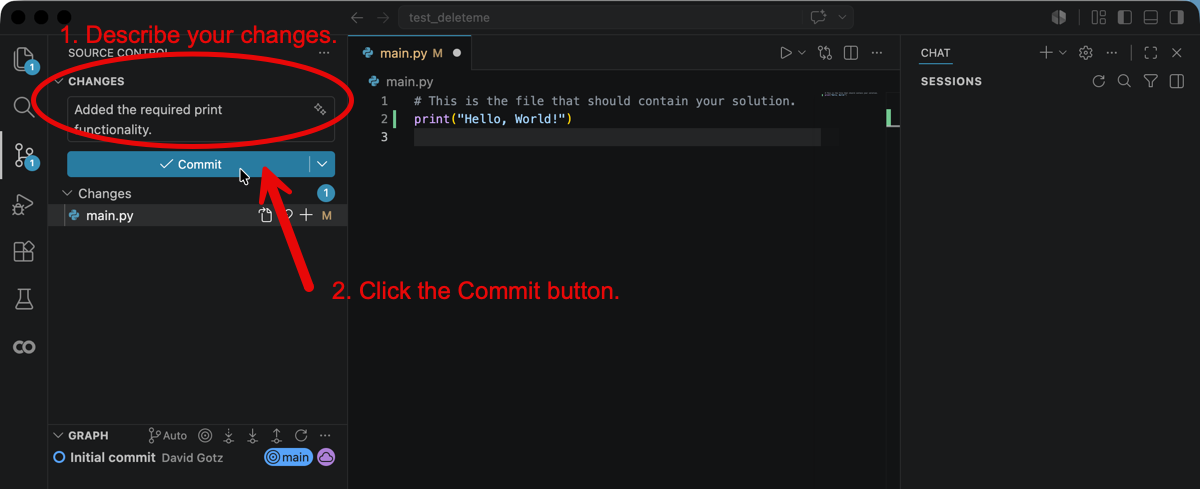
You'll now see the Source Control section of the VS Code user interface. It lists the files that have been changed, and has a text box in which you can describe the edits you've made. Add your comments to the "Changes" box as shown in the screenshot below. Then click on the blue Commit button to commit your changes to your repo. The act of "Committing" tells Git that this is a "version" of your file that you want it to remember. Later on, if a future edit messes anything up, you'll be able to easily come back to this version because it was committed to your repo.
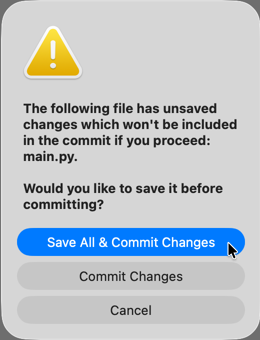
If you haven't already saved your edited files, VS Code will warn you that you have unsaved changes. Assuming you do want to keep your edits, click "Save All and Commit Changes." If your files have all been saved, you'll not see this option. That's normal and expected!
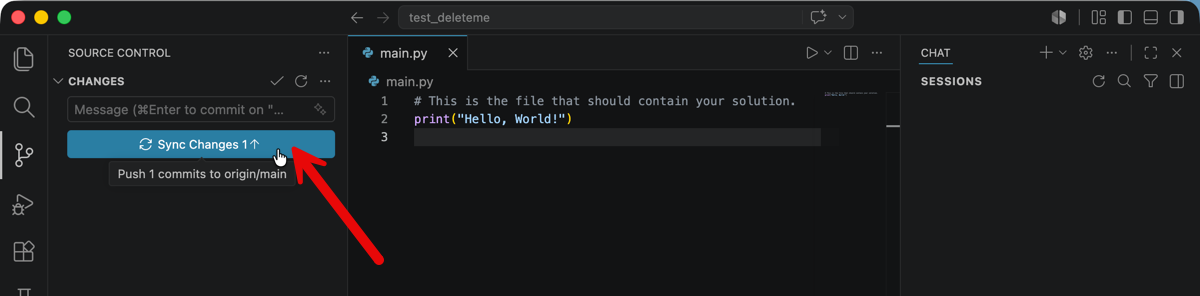
The last step is to sync your committed changes with GitHub. This is an important step! Don't forget it! This step takes the changes you've committed locally on your own computer and pushes them to your account on GitHub. You can accomplish this by clicking on the blue "Sync Changes" button which appears after you commit.
With your edits committed and synced, you're now ready to start working on the next phase of your project's solution. The Source Control panel should now be empty, reflecting that you no longer have any edits that have not yet been committed to your repo. You can return to the original editor section of VS Code by clicking on the top icon on the left sidebar showing an icon with a stack of files. Click that button to return to the main editor screen of VS Code, as shown in the screenshot below.