| Step 1 |
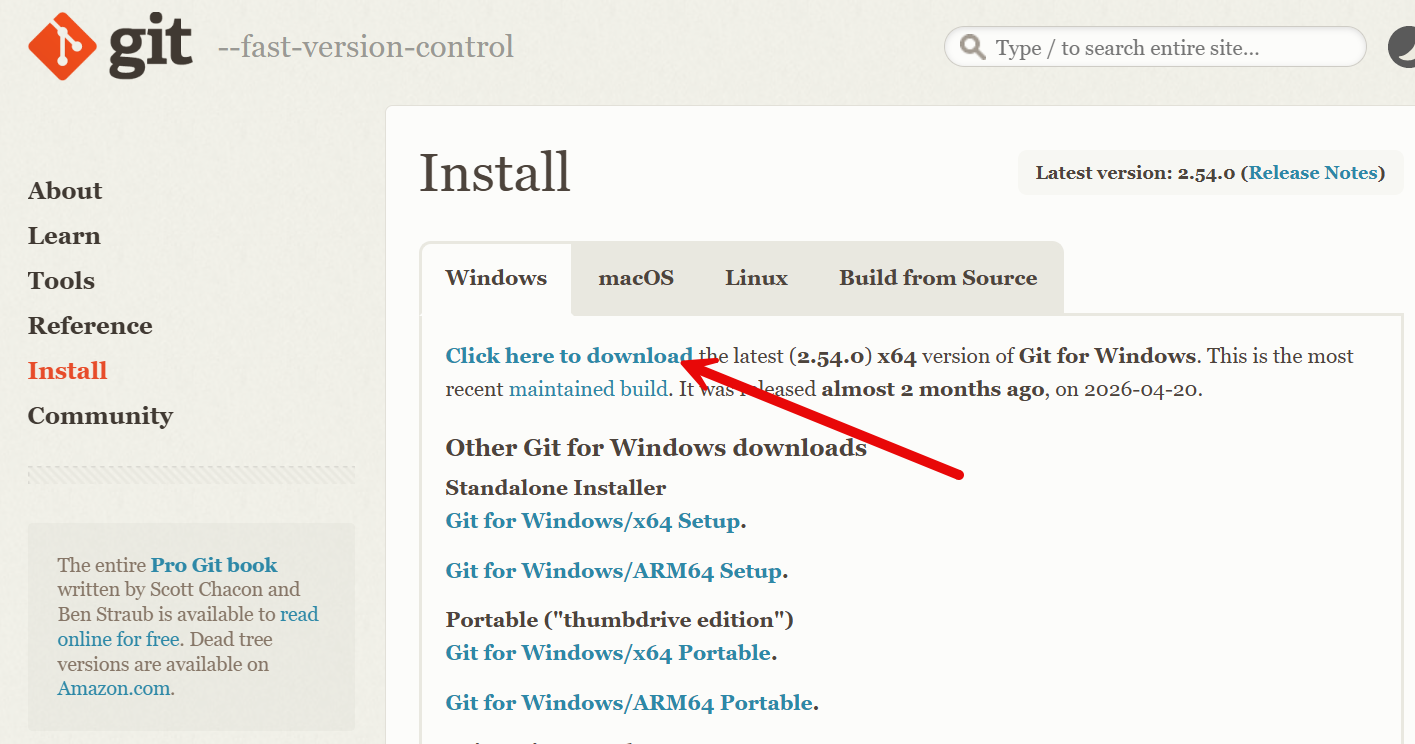
User your web browser to visit the git website (https://git-scm.com/install/windows). On the Windows tab, click the "Click here to download" link to start downloading the git installer to your computer.
|
| Step 2 |
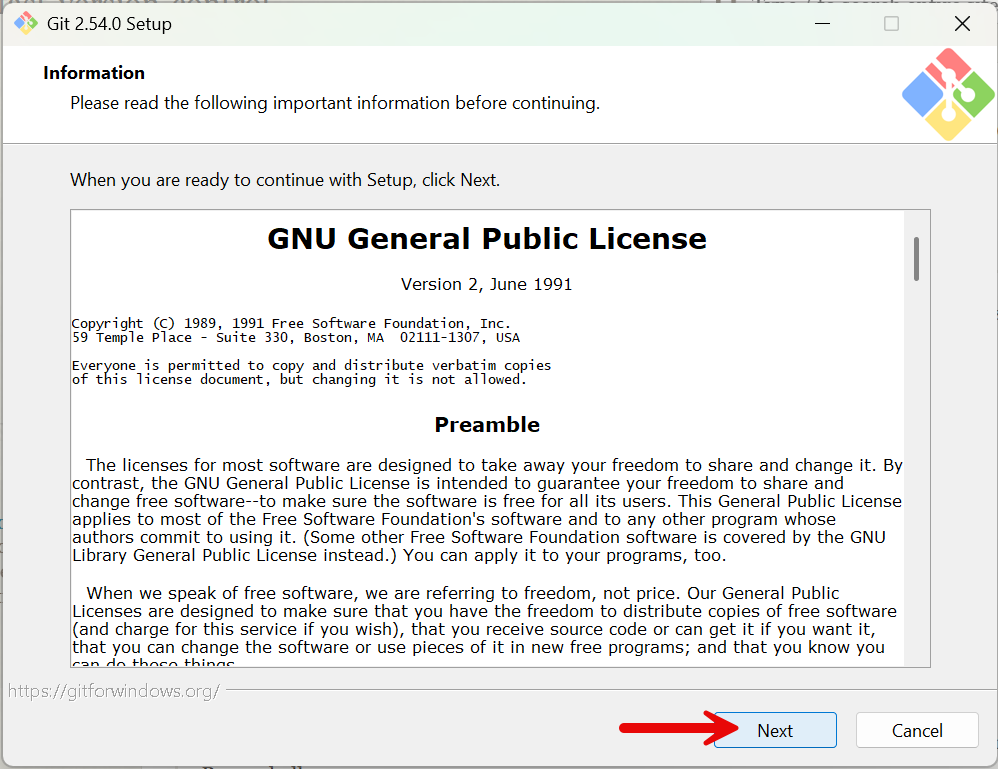
Run the installer that you just downloaded. It will open an installer window that asks you severeal questions (starting with the license). Click "Next" on every page to accept the defaults for all questions.
|
| Step 3 |
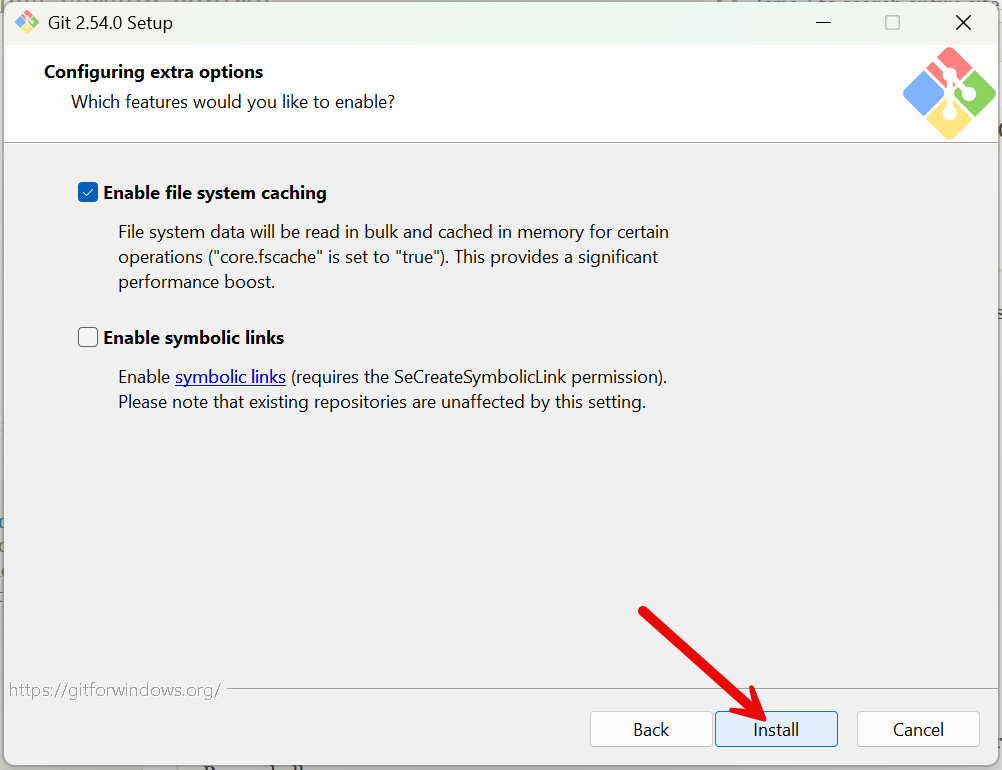
Eventually you'll reach the last step where you'll see an "Install" button instead of a "Next" button. Click the "Install" button to complete the installation of git.
|
| Step 4 |
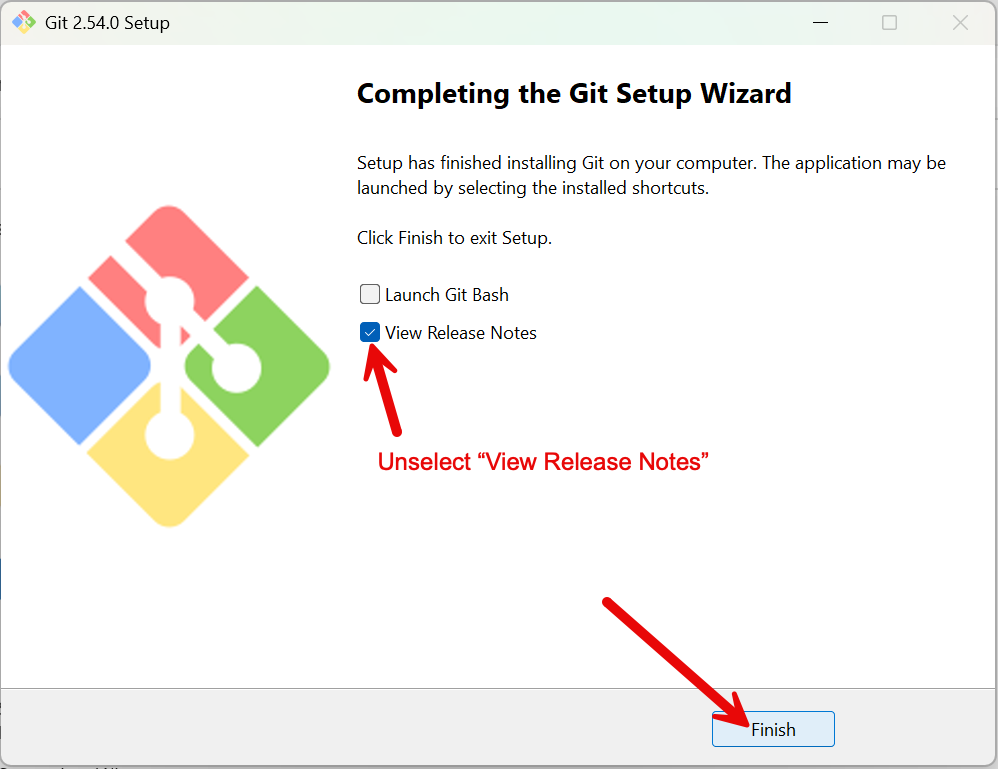
Once git has been installed, you'll see a finish page. You can unselect the "View Release Notes" option, then click the "Finish" button. You are now done installing git. Next, it's time for VS Code itself!
|
| Step 5 |
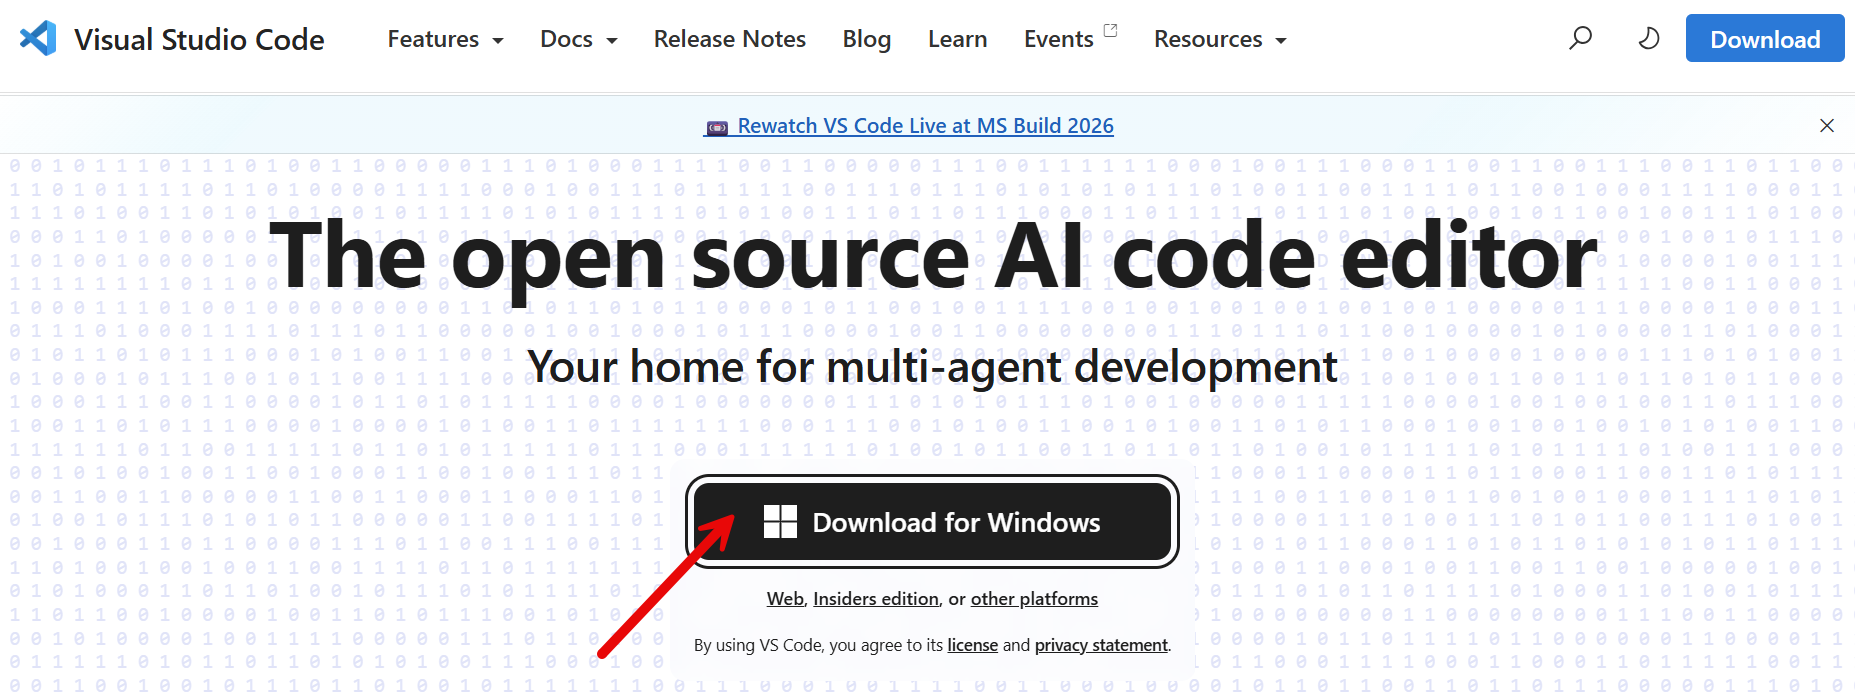
Use your web browser to visit the VS Code website (http://code.visualstudio.com). Click the black "Download for Windows" button to download the VS Code installer to your computer.
|
| Step 6 |
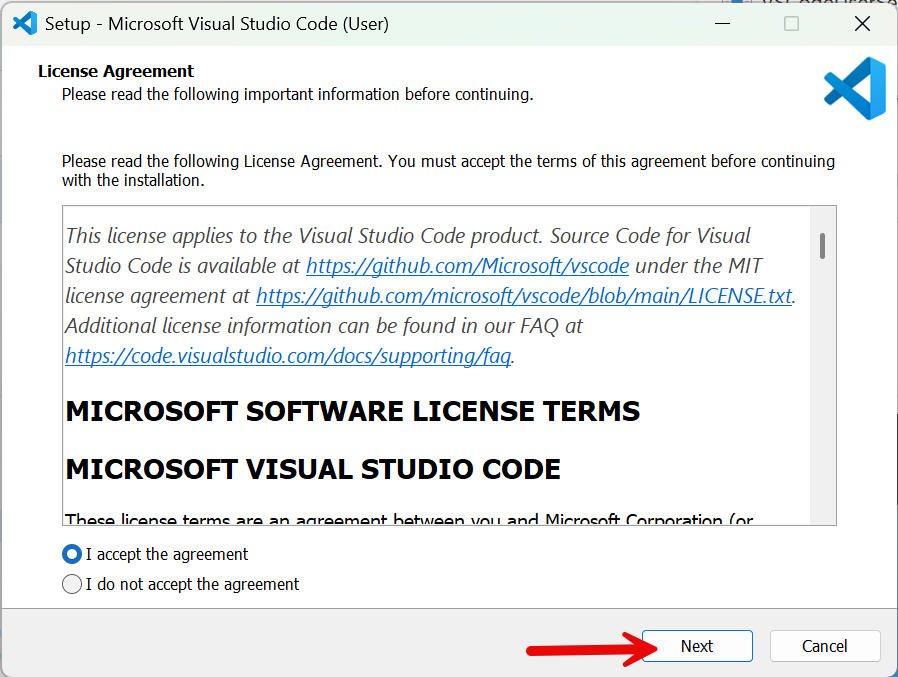
Run the installer that you just downloaded. It should open a VS Code installer window as shown in the screenshot. Just like you did with git, click the "Next" button on each screen to accept the default installation options.
|
| Step 7 |
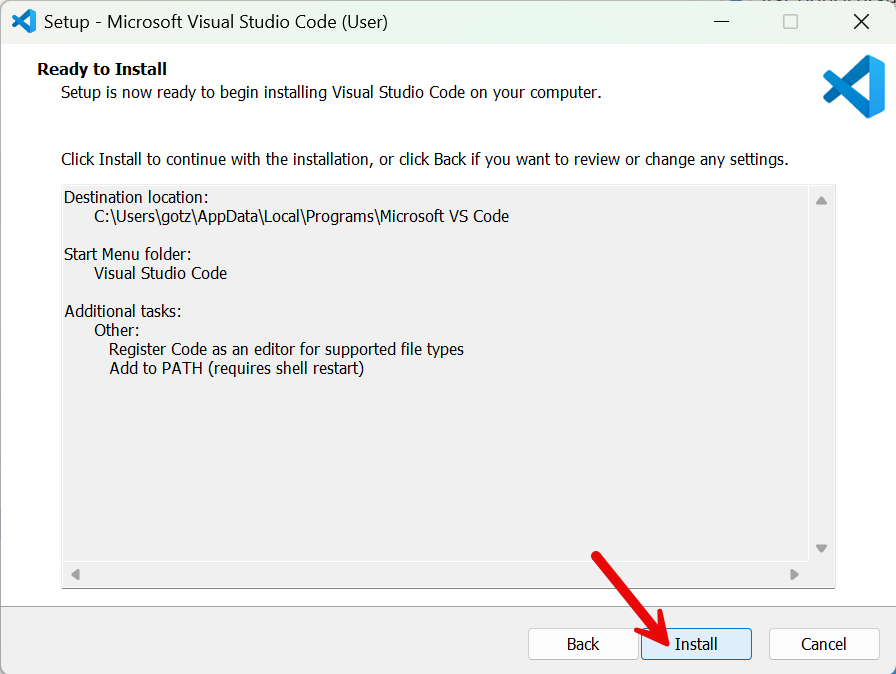
Eventually you'll reach the last step where you'll see an "Install" button instead of a "Next" button. Click the "Install" button to proceed with the installation of VS Code.
|
| Step 8 |
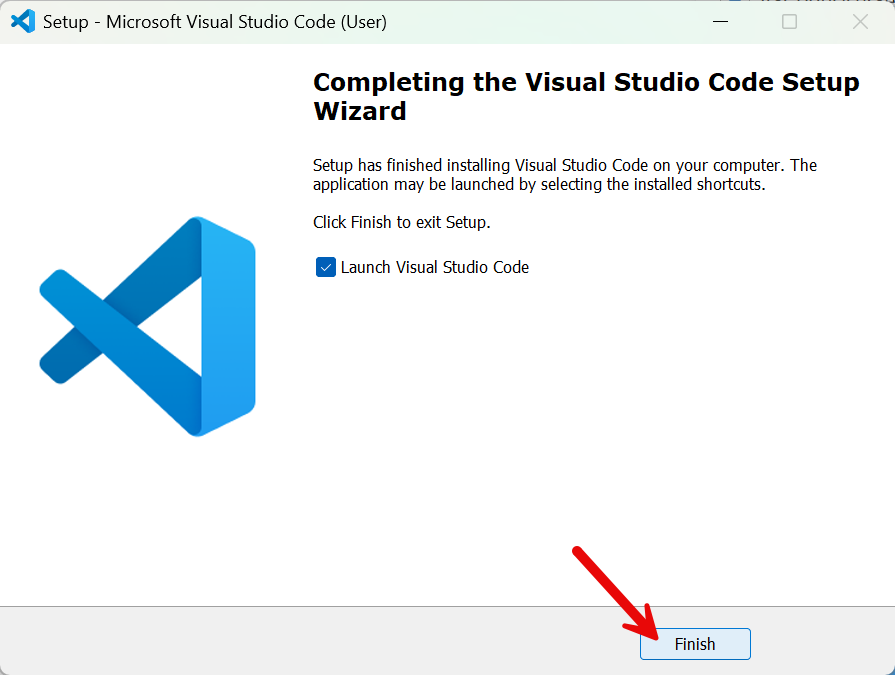
Once the installation completes, you'll see a "Finish" button with an option on the screen to "Launch Visual Studio Code." Click the Finish button to close the installer and to open VS Code for the first time.
|
| Step 9 |
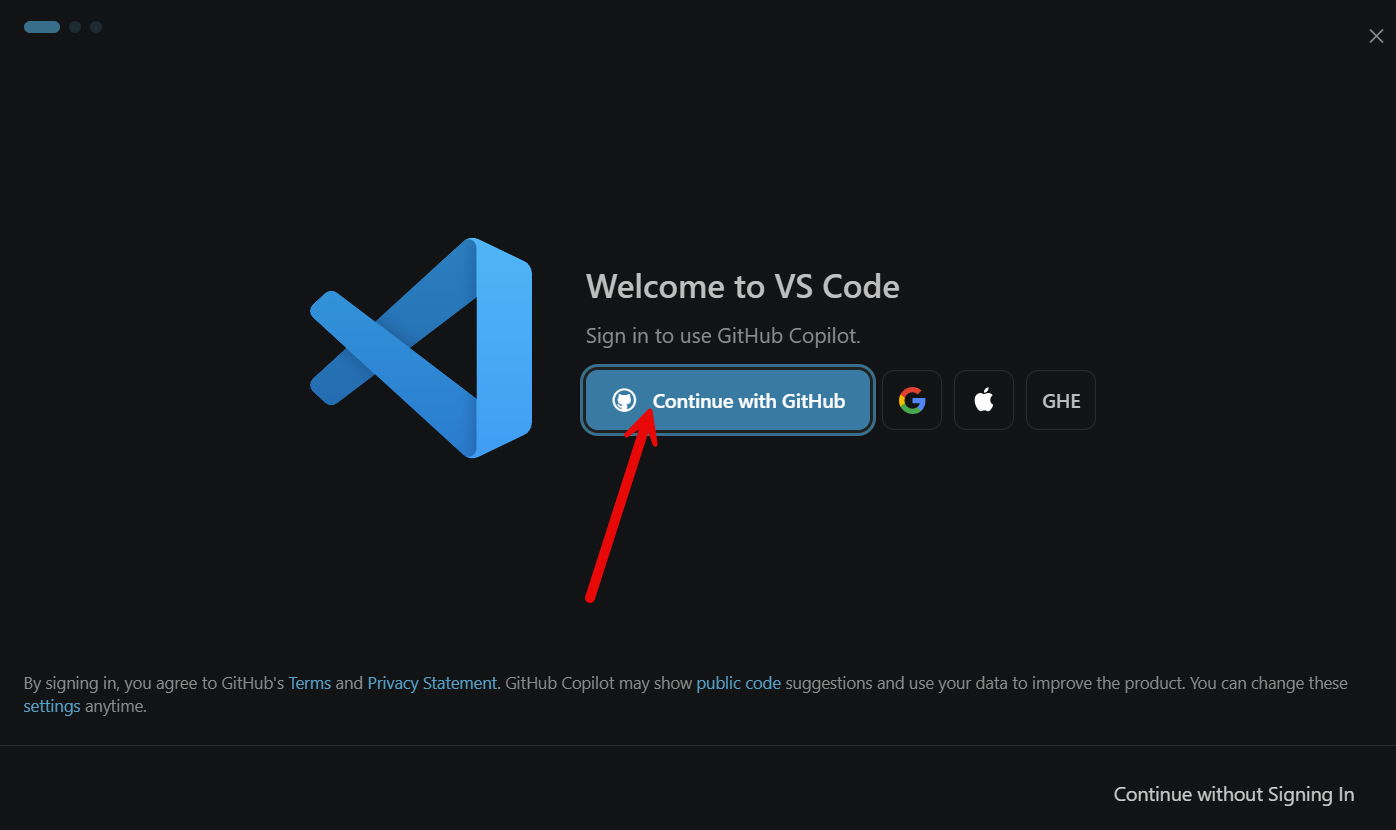
You will next see a Welcome to VS Code screen. You'll want to authenticate with your GitHub account to access the full features of VS Code. Click the "Continue with GitHub" button.
|
| Step 10 |
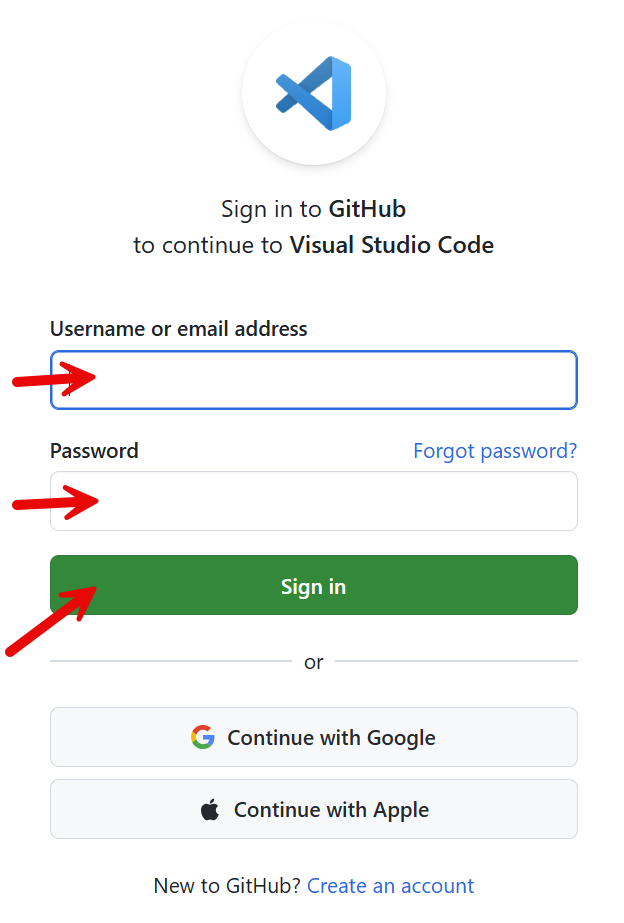
You should be transitioned to your web browser which will display a page from GitHub asking you to enter your GitHub credentials. Sign in with your GitHub account.
|
| Step 11 |
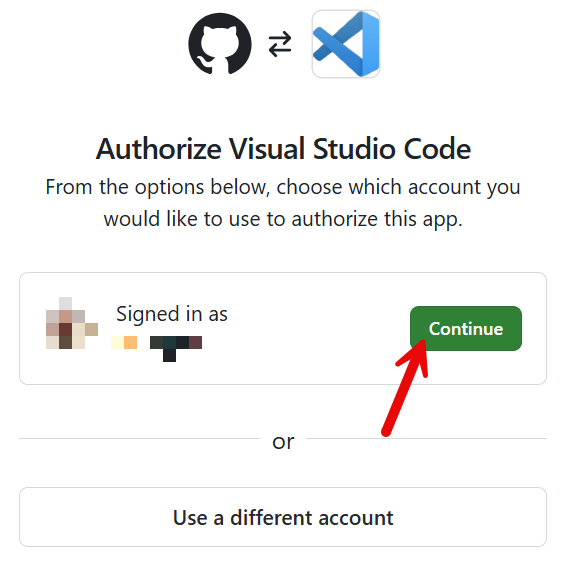
Once you authenticate with GitHub, you'll be taken to a page that says "Authorize Visual Studio Code" page. Click the green Continue button to link your GitHub account with the installation of VS Code on your computer.
|
| Step 12 |
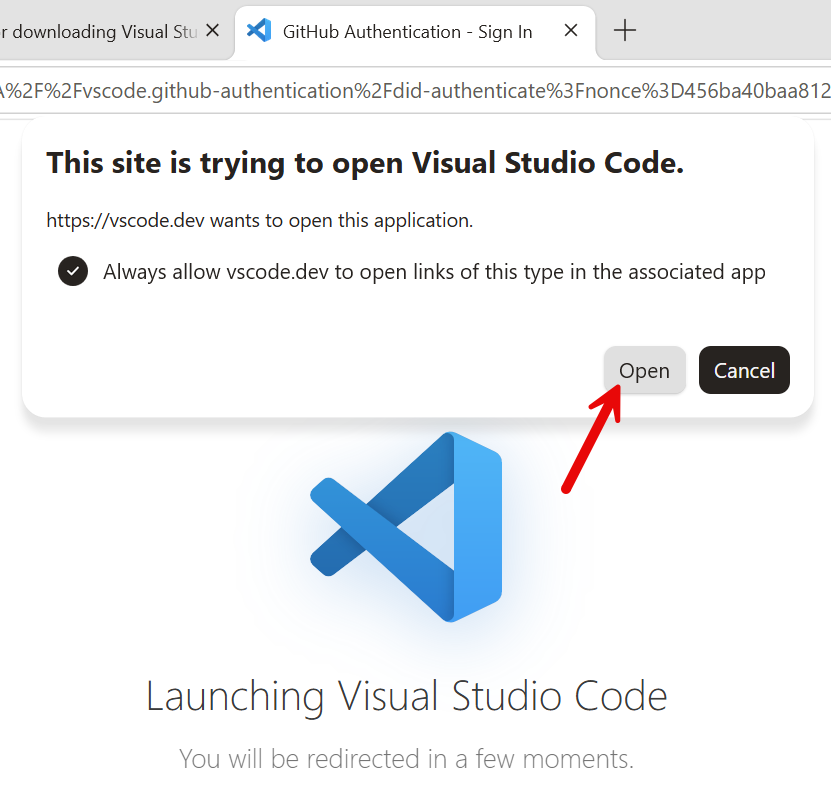
Depending on your computer's security settings, you may be asked to allow your browser to open Visual Studio Code. If you see this screen, click Open to allow the GitHub authentication process to bring you back to VS Code.
|
| Step 13 |
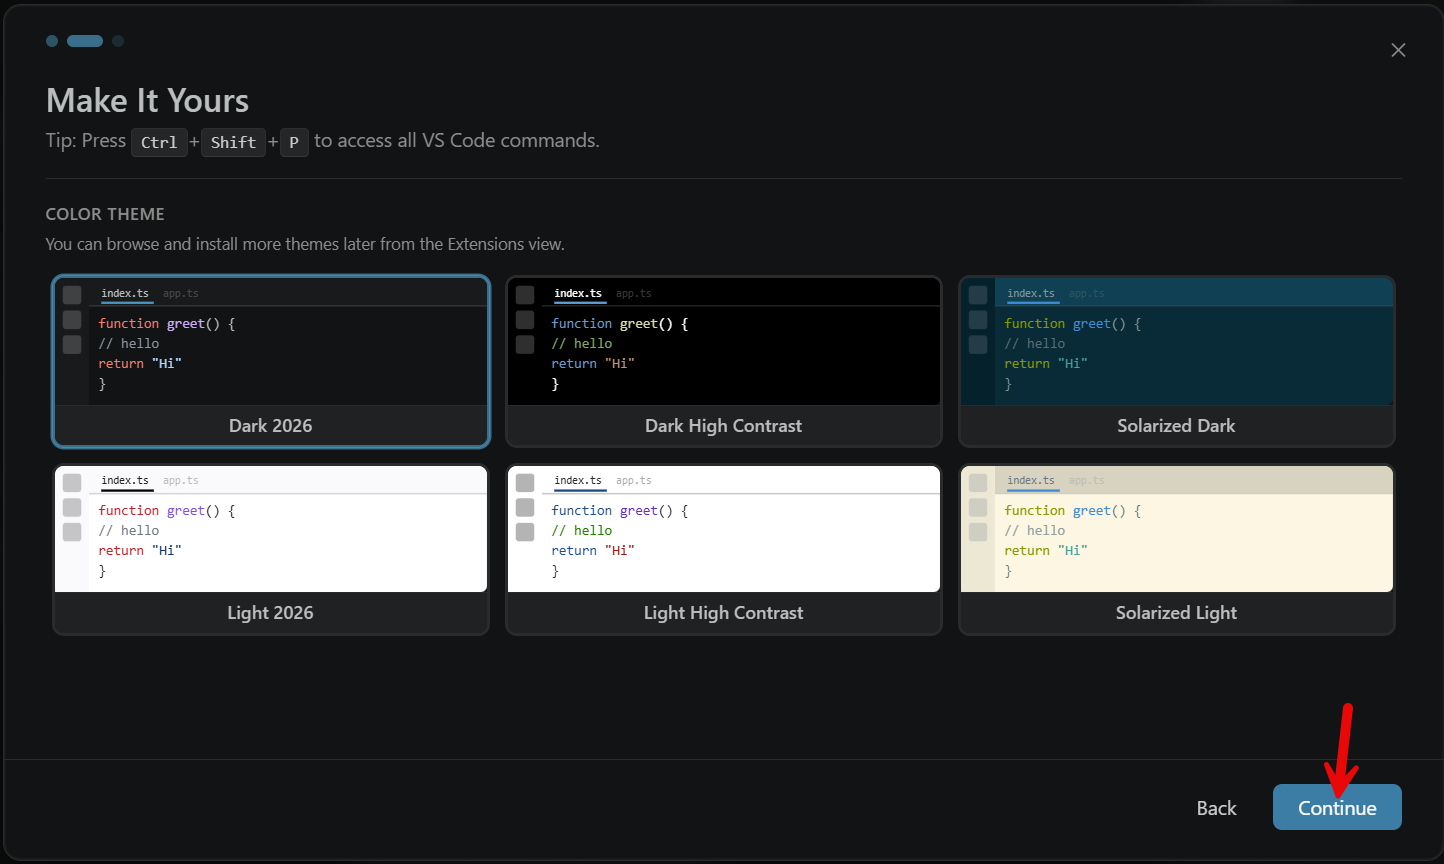
Now that you are back in VS Code, you'll see a couple of "1st time in VS Code" screens. Just click Continue to move to the next screen.
|
| Step 14 |
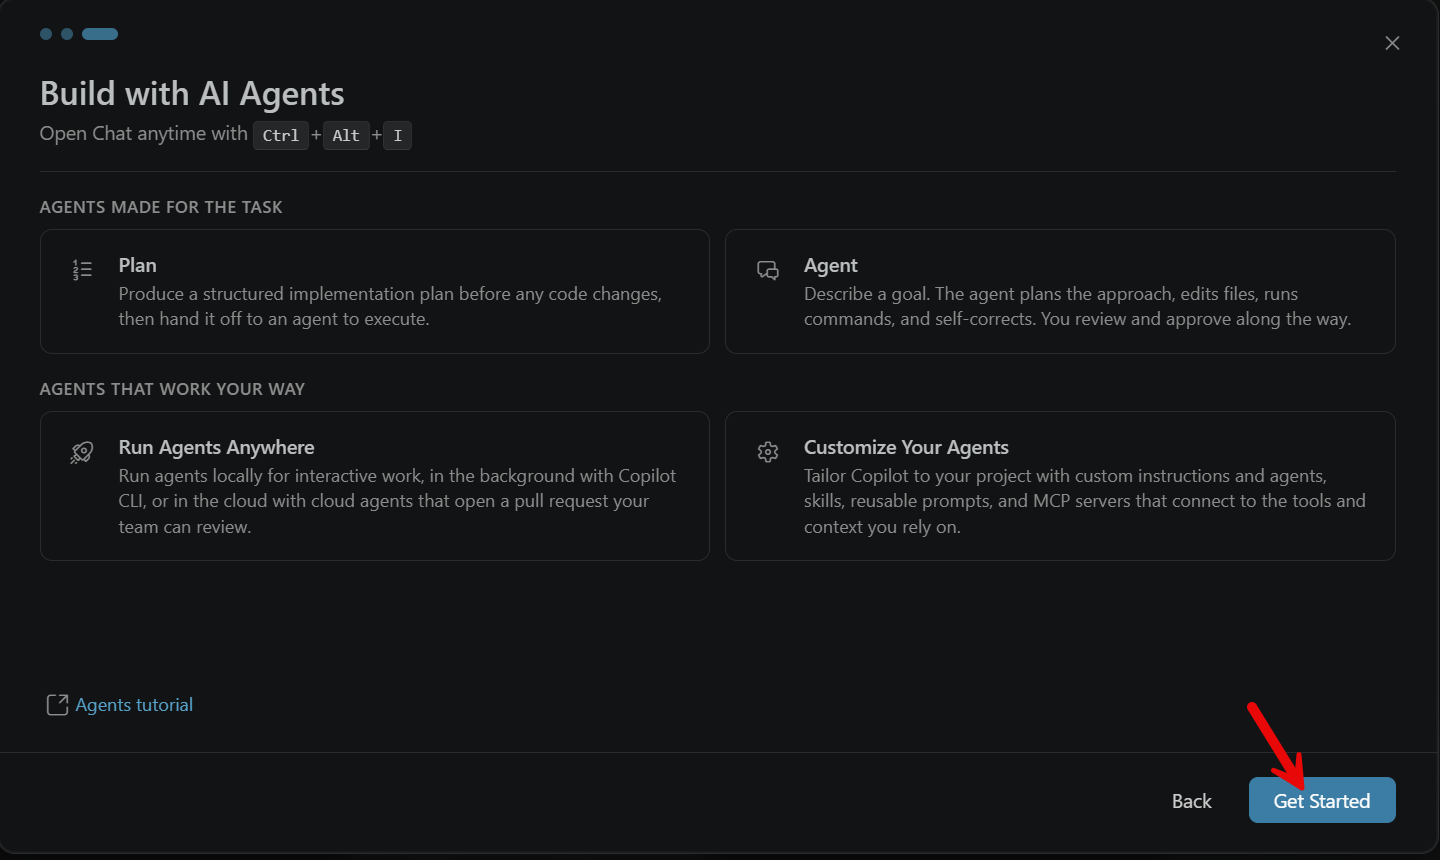
Another "1st time in VS Code" screens talks about building with AI. Click the "Get Started" button at the bottom right to continue.
|
| Step 15 |
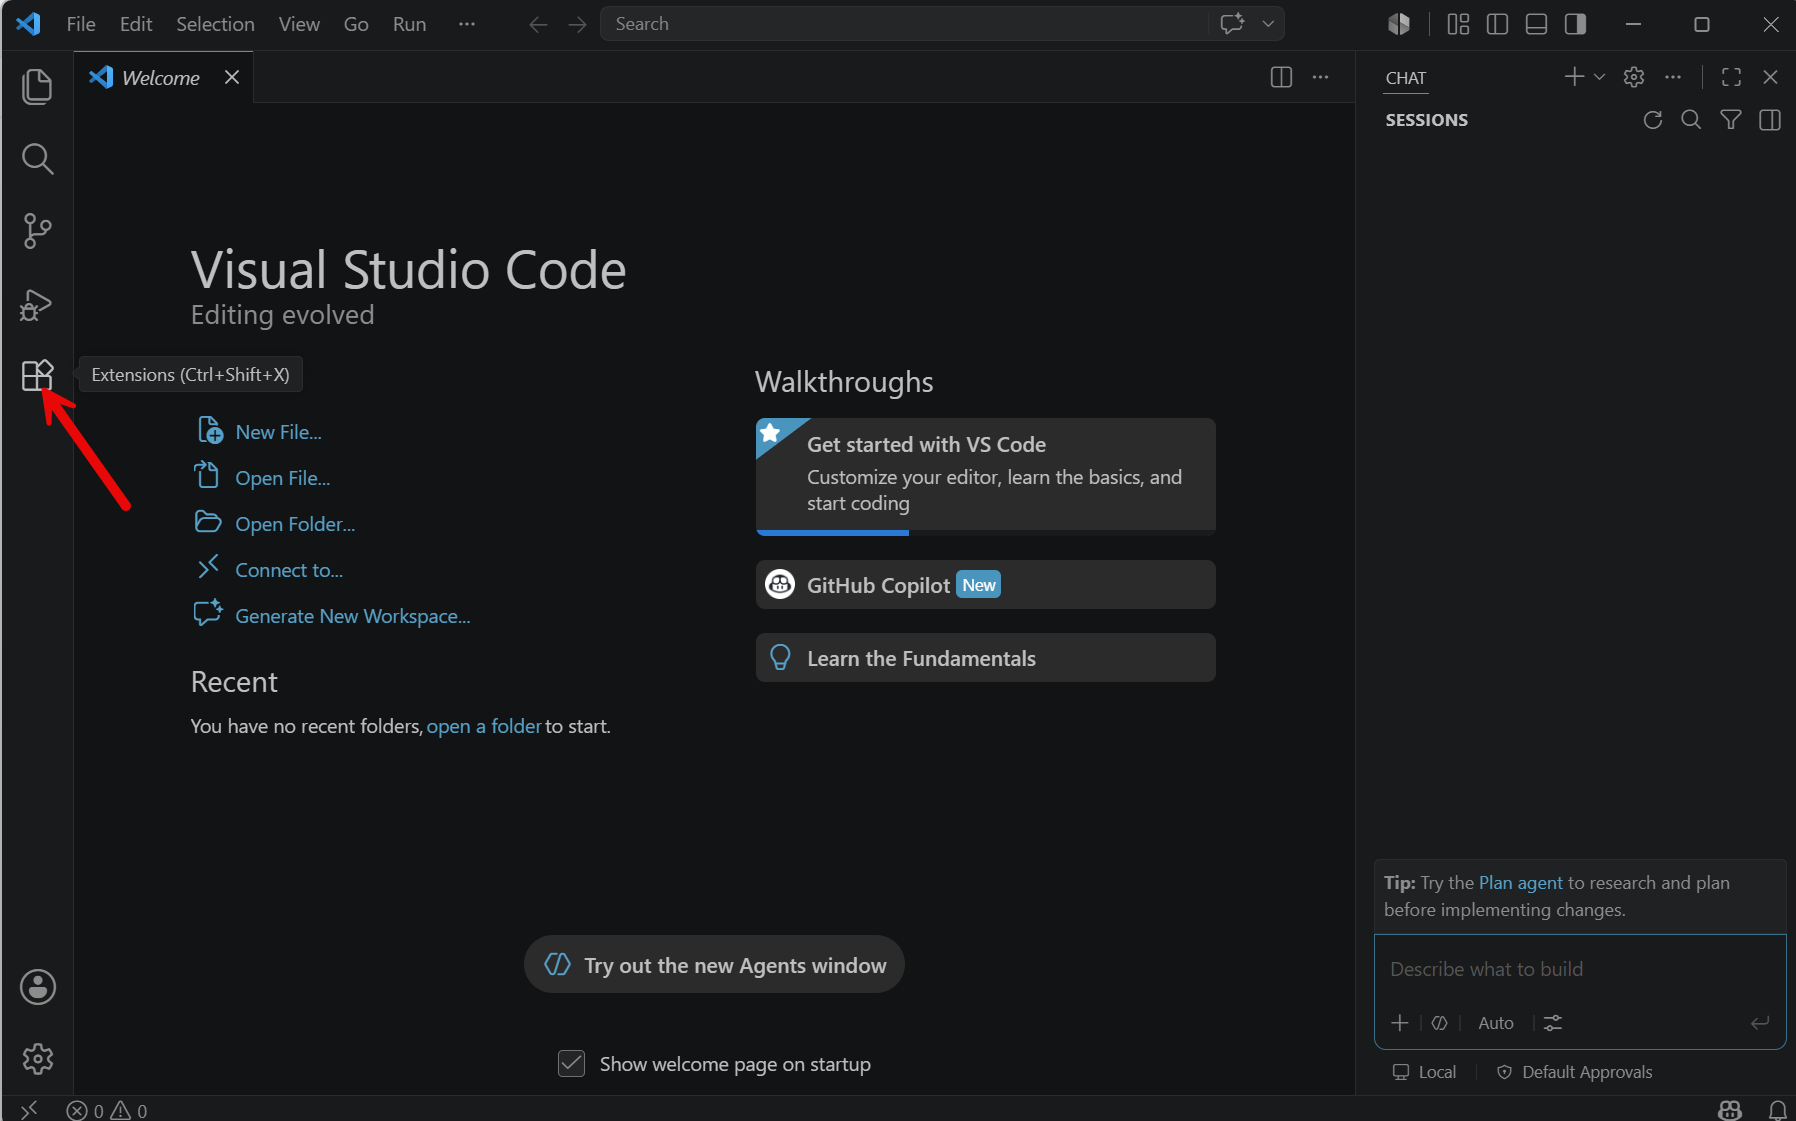
VS Code is installed! Now we just need one last
configuration step before it's 100% ready for us to use in this class.
More specifically, we'll need to install the VS Code extensions for Python programming. It
turns out VS Code can support programming in MANY different languages.
However, for this class we'll focus only on Python. Therefore, we'll
install the Python extensions for VS Code. TO make this happen, we'll
first click on the Extensions icon on the left side of the screen.
|
| Step 16 |
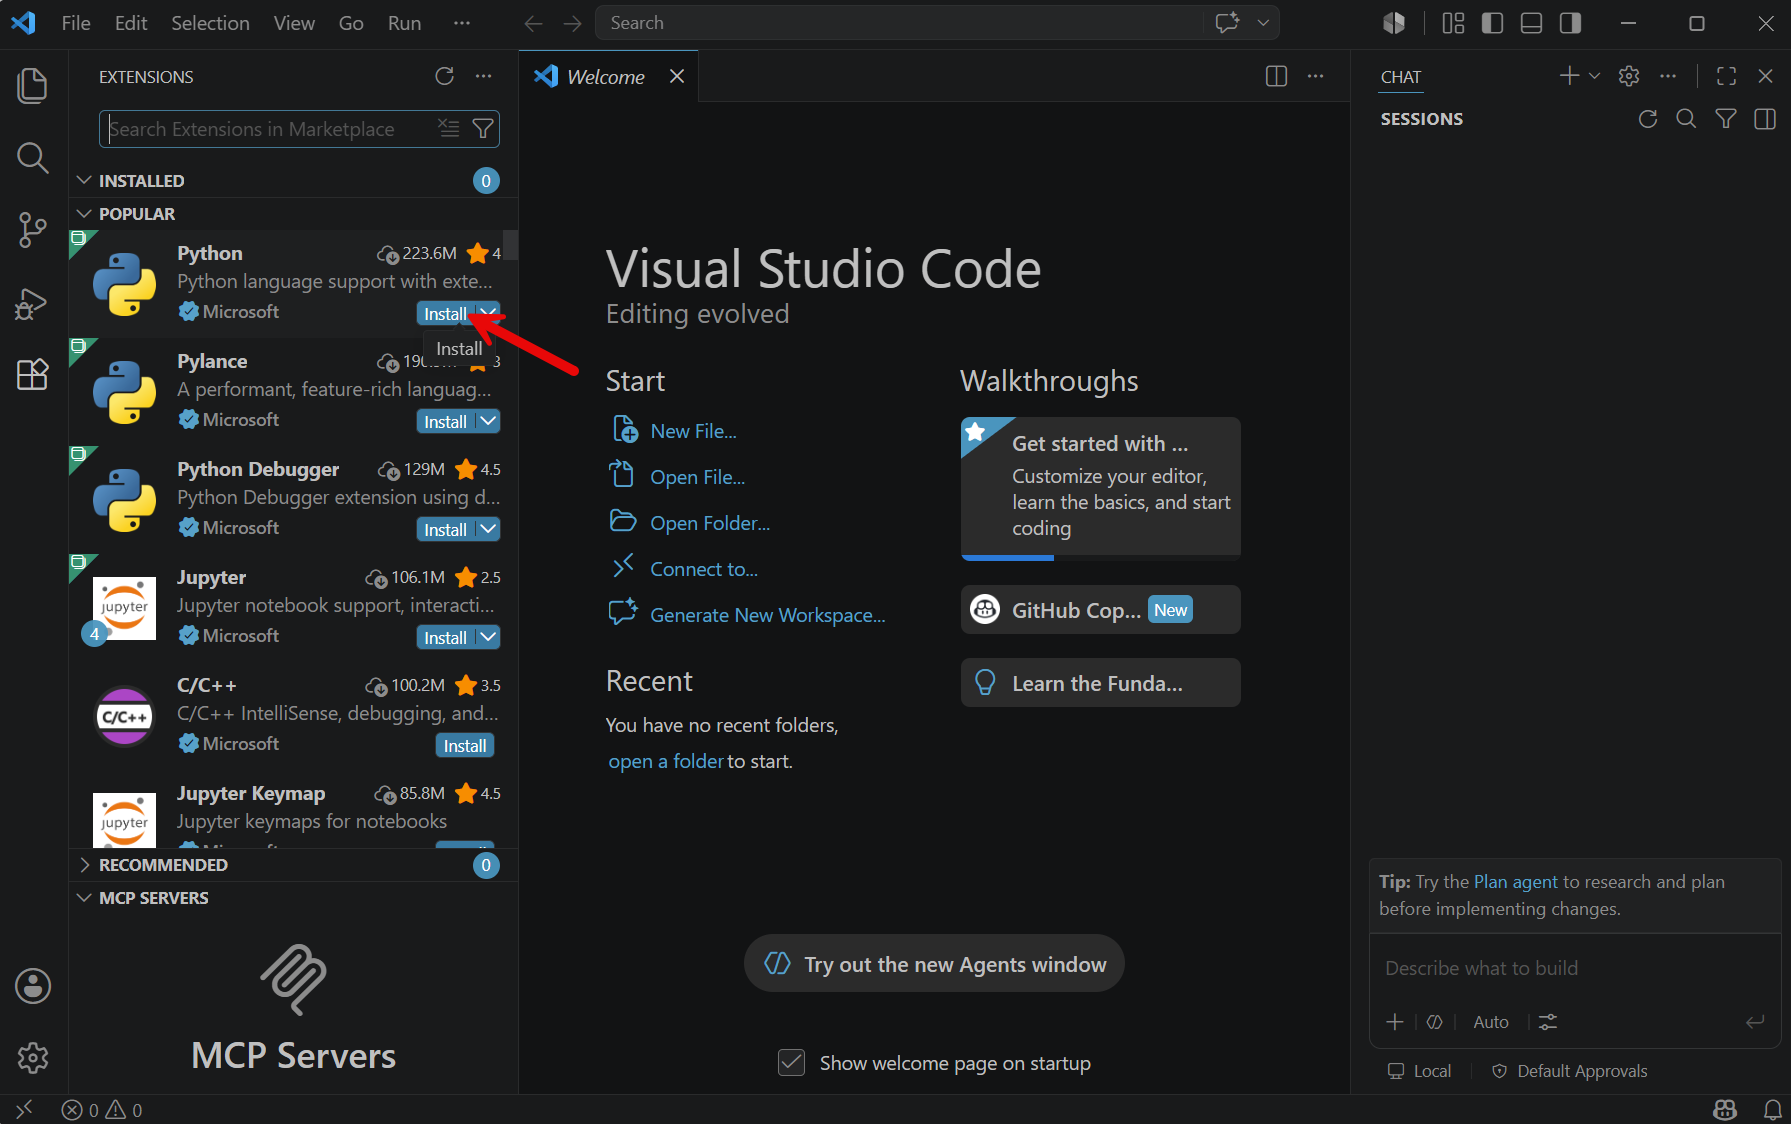
Search for Python if needed. Since Python is so popular, it might be at
the top already as in this screenshot. Click the blue Install button
for the Python extension to install the needed components.
That's it! Once this step is done, You've installed VS Code! You can
exit the application. We'll come back to VS Code regularly this
semester for both classroom exercises and homework. For now, however,
you can quit the VS Code app.
|